How to Take Screenshot iPhone 8: Easy Step-by-Step
Learn how to take a screenshot on iPhone 8 with our comprehensive step-by-step guide. Use Markup to enhance your screenshots.
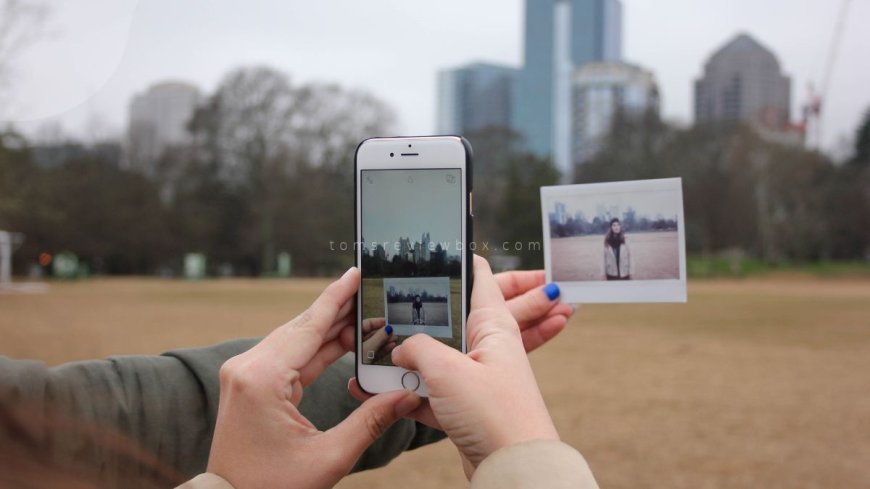
Want to capture your screen on the iPhone 8 but not sure how? We've got you covered with a simple step-by-step tutorial on taking screenshots effortlessly. Whether you're saving important information or sharing funny memes, learning this trick will make your life easier. Ready to master this handy feature and level up your iPhone skills?
Key Takeaways
-
Capture Screenshots Easily: Understand how to take screenshots on your iPhone 8 effortlessly by following simple steps.
-
Explore Editing Options: Learn how to edit and share your screenshots directly from your iPhone 8 for a personalized touch.
-
Organize Your Screenshots: Manage your screenshots effectively on your iPhone 8 to easily locate and access them when needed.
-
Tips for Quality Screenshots: Implement tips for capturing better screenshots on your iPhone 8 to enhance the quality of your images.
-
Solutions to Common Issues: Find solutions to common problems related to taking screenshots on iPhone 8, ensuring a seamless experience.
-
Enhance Sharing Experience: Share your screenshots with ease after learning how to capture, edit, and manage them efficiently.
Understanding Screenshots on iPhone
Basics of Taking Screenshots
Taking screenshots on your iPhone is essential for capturing important information or moments. Screenshots can be used to save receipts, conversations, or any vital details you need to refer back to later. To capture a screenshot on your iPhone 8, simply press the side button and the Home button simultaneously. This method works universally across all iPhone models.
Accessing your screenshots quickly allows you to view or share them with ease. Once you take a screenshot, a thumbnail will appear in the bottom left corner of your screen. Tapping on this thumbnail opens the screenshot for immediate viewing or sharing.
Models and Methods
Different iPhone models may have varying methods for taking screenshots. For iPhones with Face ID, such as the iPhone X and newer models, simultaneously press the side button and the volume up button to capture a screenshot. On the other hand, iPhones with Touch ID, like the iPhone 8, require pressing the side button and the Home button together in one step.
Comparing these methods showcases the evolution of technology in Apple devices. The transition from Touch ID to Face ID has streamlined the process of taking screenshots by incorporating facial recognition technology.
Identifying the specific buttons to press for each model ensures that you can easily capture screenshots without confusion. Understanding these distinctions helps users navigate their devices efficiently based on their particular iPhone model.
Access and Management
After taking a screenshot, as a step, it is stored in your Photos app under an album named "Screenshots." This centralized location makes it convenient to locate all your captured screenshots in one place.
Efficiently managing and organizing your screenshots involves creating folders or albums within your Photos app. By categorizing your screenshots into different folders based on content or relevance, you can access them swiftly whenever needed.
Accessing your screenshots for viewing or sharing purposes enhances communication and productivity. Whether you need to reference a specific detail from a conversation or share an image with someone, having quick access to your screenshots simplifies these tasks.
How to Capture Screenshots on iPhone 8
Using Side Button
Master the technique of using the side button to capture screenshots. Understand the quick and simple process of pressing the side button. Practice releasing the side button promptly to take a screenshot effectively.
Using Touch ID
Learn the steps to take a screenshot using Touch ID on different iPhone models. Understand the combination of buttons required to capture a screenshot with Touch ID. Practice pressing the Home button simultaneously with the side button for a screenshot.
Editing Screenshots
Explore the editing tools available for enhancing your screenshots. Learn how to add drawings and text to personalize your screenshots. Discover the features of Markup for editing screenshots on your iPhone.
Sharing Screenshots
Understand the various options for sharing your screenshots with others. Learn how to share screenshots directly from your iPhone. Explore the different platforms where you can share your screenshots.
Taking Screenshots on Other iPhone Models
With Face ID
To take a screenshot on iPhone models with Face ID, simultaneously press the side button and the volume up button. Quickly release both buttons to successfully capture the screen. This method ensures a smooth and efficient way to save important information or memorable moments.
Understanding the specific buttons to press for capturing a screenshot with Face ID is crucial. By pressing the side button and the volume up button at the same time, you activate the screenshot function on your device. This simple action allows you to freeze any content displayed on your screen instantly.
Practicing releasing the buttons quickly after pressing them is essential to ensure a successful screenshot. By swiftly letting go of both the side button and volume up button, you prevent accidental actions or disruptions that could interfere with capturing your desired screen image. This practice guarantees that you consistently achieve clear and accurate screenshots.
With Touch ID and Top Button
On iPhone models featuring Touch ID and the top button, capturing a screenshot involves pressing both buttons simultaneously. Combining the top button with the Home button triggers the screenshot function, enabling you to save images of important content or conversations effortlessly.
Understanding the process of pressing both the top button and Home button together is key to taking screenshots on devices with Touch ID. This action activates the screenshot feature, allowing you to preserve valuable information or share interesting content with others seamlessly.
Practice releasing both buttons simultaneously after pressing them to capture a screenshot effectively. Releasing these buttons promptly ensures that you successfully save any visual content displayed on your device's screen without encountering any technical issues or errors.
Locating Saved Screenshots
Photo App
The Photo app on your iPhone is where you can find all your screenshots neatly stored. Navigating through this app allows you to access your saved screenshots effortlessly. Within the Media Types section in Albums, you can quickly locate your screenshots among other media.
Albums Section
The Albums section plays a crucial role in organizing your screenshots efficiently. By categorizing your screenshots into different albums, you can keep them well-organized and easy to find. Utilizing the Albums section not only helps in managing but also in quickly accessing your screenshots when needed.
Editing and Sharing Your Screenshots
Editing Tools
Discover the various editing tools to customize your screenshots. Learn how to crop, add filters, and rotate your screenshots easily. Explore advanced options for enhancing screenshot quality.
Sharing Options
Explore different sharing options for your screenshots. Learn to share via messages, email, or social media platforms. Discover the convenience of sharing directly from the Photos app.
Managing Screenshots on iPhone 8
Viewing Screenshots
Understanding how to view your screenshots is essential for managing them effectively. Access the thumbnail preview by navigating to the Photos app and selecting "Screenshots." From there, tap on a screenshot to view it in full-screen mode.
Deleting Screenshots
To delete unwanted screenshots, swipe left on the thumbnail and tap "Delete." For multiple deletions, select "Select" in the top right corner, then choose the screenshots you want to remove. Permanently delete screenshots by going to the "Recently Deleted" album and tapping "Delete All."
Organizing Screenshots
Organizing your screenshots within the Photos app helps streamline their management. Create folders or albums by selecting screenshots and choosing "Add to Album." Categorizing screenshots allows for easy access and ensures a clutter-free photo library.
Tips for Better Screenshots
Timing Your Shot
Master the art of timing your screenshot to capture the perfect moment. Anticipate when to take a screenshot and be quick and precise. For instance, capturing a high score in a game or a hilarious text message.
Using AssistiveTouch can enhance your screenshot experience on an iPhone. Enable and customize AssistiveTouch for easy access to screenshot functionality. The benefits include convenience in taking screenshots with just a few taps on the screen.
Using AssistiveTouch
Discover how AssistiveTouch simplifies the process of taking screenshots on your iPhone. By customizing this feature, you can set up shortcuts for easier access to screenshots. This tool proves especially useful when you need to capture content quickly.
Third-party apps play a significant role in elevating your screenshot capabilities. These apps offer advanced editing tools and seamless sharing options for your screenshots. By integrating these apps with your device, you can manage and enhance your screenshots effectively.
Third-Party Apps
Explore various third-party apps that add value to your screenshot-taking experience. Look into apps that provide features like annotations, filters, and cloud storage integration. Examples include Lightshot and Skitch, which offer diverse functions for editing and sharing screenshots.
When capturing time-sensitive content, remember to be quick and precise in taking the screenshot. Develop the skill of anticipating the right moment to capture images effectively. Utilize AssistiveTouch on your iPhone to simplify the process of taking screenshots by setting up customized shortcuts. Enhance your screenshot management by integrating third-party apps that offer advanced editing and sharing features.
Common Issues and Solutions
Unable to Take Screenshots
If you're unable to capture screenshots on your iPhone 8, several factors could be at play. Common reasons include software glitches, insufficient storage space, or a malfunctioning hardware button. To troubleshoot, ensure your device has enough storage and update your iOS version.
Troubleshoot hardware issues by checking if the Volume Up and Side buttons are functioning correctly. Software-related problems can be resolved by restarting your device or resetting the settings. If all else fails, seek assistance from Apple Support for further guidance.
Screenshots Not Saving
When your screenshots fail to save on your iPhone 8, it can be frustrating. The issue may stem from permissions settings that prevent Photos app access or storage restrictions. To resolve this, check your Photos app permissions and adjust them accordingly.
Troubleshoot saving problems by verifying if there's enough space in your iCloud storage or device memory. Ensure that the Photos app is updated to the latest version available on the App Store. By addressing these issues, you can ensure that all your screenshots are saved securely.
Editing Issues
Encountering editing difficulties while customizing screenshots is not uncommon. These issues could arise from incompatible editing tools or software bugs affecting image modifications. To address this, ensure that you're using compatible apps and features for editing purposes.
Troubleshoot editing problems by closing and reopening the editing tool or restarting your device to clear any temporary glitches. Consider updating the editing app to its latest version for enhanced functionality. By following these steps, you can optimize the quality of your edited screenshots.
Final Remarks
You now have a solid grasp of how to capture, edit, and manage screenshots on your iPhone 8. Understanding the process, locating saved screenshots, and learning tips for better results will undoubtedly elevate your screenshot game. By implementing the techniques discussed, you can effortlessly capture and share moments that matter to you.
Take charge of your iPhone 8's screenshot capabilities today. Apply the shared tips and tricks to enhance your user experience and make the most out of your device. Share this knowledge with friends and family to help them level up their screenshot skills too.
Frequently Asked Questions
How do I capture a screenshot on iPhone 8?
To capture a screenshot on iPhone 8, simultaneously press the Side button and the Home button. You will see a brief flash on the screen indicating that the screenshot has been taken.
Where can I find the screenshots saved on my iPhone 8?
All screenshots taken on your iPhone 8 are saved in the "Screenshots" album within the Photos app. Simply open the Photos app, go to Albums, and look for the Screenshots album to access all your captured screenshots.
Can I edit my screenshots on iPhone 8?
Yes, you can edit your screenshots directly on your iPhone 8. After capturing a screenshot, tap on the preview that appears at the bottom left corner of the screen. This will open up editing options where you can crop, annotate, or make other adjustments to your screenshot.
How can I share my screenshots from iPhone 8?
To share a screenshot from your iPhone 8, open the Photos app, navigate to the Screenshots album, select the screenshot you want to share, tap on the Share icon (box with an arrow pointing up), and choose how you want to share it (via Messages, Mail, AirDrop, etc.).
Are there any tips for capturing better screenshots on iPhone 8?
For better screenshots on iPhone 8:
-
Ensure good lighting
-
Avoid cluttered backgrounds
-
Use editing tools for enhancements
-
Capture important details
-
Experiment with angles
Remember these tips to capture high-quality screenshots effortlessly.
What's Your Reaction?





















![MacBook Pro M5: All the features and specs you need to know [LEAKS REVEALED]](https://tomsreviewbox.com/uploads/images/202502/image_430x256_67bd6d7cd7562.jpg)
