How to Take a Screenshot of Your Laptop Screen: Print Screen Key Tips
Learn how to take a screenshot of your laptop screen with our expert tips and tricks. Capture images effortlessly with the Print Screen key.
In today's digital age, knowing how to click and grab a screenshot of your laptop screen is a valuable skill. Whether you want to capture an important document, save a memorable moment, or troubleshoot tech issues, mastering this technique is essential. By following simple steps, you can quickly and effortlessly capture anything displayed on your screen. Understanding the historical context of screenshots and their evolution over time can provide insight into their significance in modern computing. Stay tuned as we delve into the easy methods and tips for capturing screenshots on your laptop, empowering you to efficiently save and share information whenever needed.
Table of Contents
Key Takeaways
-
Be Familiar with Screenshots: Understand the purpose and benefits of taking screenshots to effectively capture and save information from your laptop screen.
-
Preparation is Key: Before taking a screenshot, ensure your screen displays the desired content and organize your workspace for a clear and efficient capture.
-
Follow a Structured Approach: Utilize step-by-step instructions for taking screenshots on your laptop, ensuring accuracy and ease of use.
-
Explore Advanced Options: Discover and experiment with advanced screenshot techniques like capturing specific areas, using keyboard shortcuts, or utilizing third-party tools for more customized screenshots.
-
Enhance and Share: Learn how to edit your screenshots by highlighting, annotating, or cropping them before sharing with others for clear communication.
-
Address Common Problems: Troubleshoot common issues that may arise when taking screenshots, such as capturing the entire screen, saving in the correct format, or dealing with blurred images.
Understanding Screenshots
Early Use of Print Screen
The Print Screen key originated in command-line systems like MS-DOS for capturing the screen. Pressing Ctrl with Prt Sc activated the "printer echo" function, allowing users to print screens directly. The IBM Model F keyboard was one of the early adopters of this feature.
In the past, the Print Screen key served a crucial role in capturing screen data for printing purposes. By pressing Ctrl with Prt Sc, users could create a snapshot of their screen's contents. This functionality was particularly useful in command-line interfaces like MS-DOS.
The IBM Model F keyboard, known for its robust design and tactile feedback, featured the Print Screen key prominently. This key's placement indicated its importance in facilitating screen captures for printing or saving data.
Evolution to Modern Use
Modern operating systems save screenshots as bitmap images in the clipboard for easy sharing and editing. Key combinations like Alt + Prt Sc enable users to capture specific windows rather than the entire screen. The transition from Windows 8 to Windows 10 brought significant enhancements to screenshot functionalities.
In contemporary systems, screenshots are saved as bitmap images in the clipboard, allowing users to paste them into various applications effortlessly. Key combinations such as Alt + Prt Sc offer more precision by capturing only the active window instead of the entire desktop.
The evolution of screenshot features from Windows 8 to Windows 10 reflects a growing emphasis on user convenience and efficiency. Newer versions of Windows introduced streamlined methods for capturing and managing screenshots, enhancing overall user experience.
Keyboards and Screenshots
Different keyboards may label the Print Screen key variably, leading to confusion among users accustomed to specific terms. Macintosh systems rely on key combinations like Command + Shift + 3 instead of a dedicated Print Screen key for capturing screens. Various keyboard models offer unique functionalities tied to the Print Screen key.
Keyboards across different brands may vary in how they label the Print Screen key, causing discrepancies in user understanding. Macintosh systems diverge from traditional setups by utilizing distinct key combinations such as Command + Shift + 3 for taking screenshots without a designated Print Screen key.
Comparing the functionalities of the Print Screen key across diverse keyboard models reveals nuances in how different manufacturers approach screen capture mechanisms, catering to varying user preferences.
Preparing to Take a Screenshot
Checking Keyboard Layout
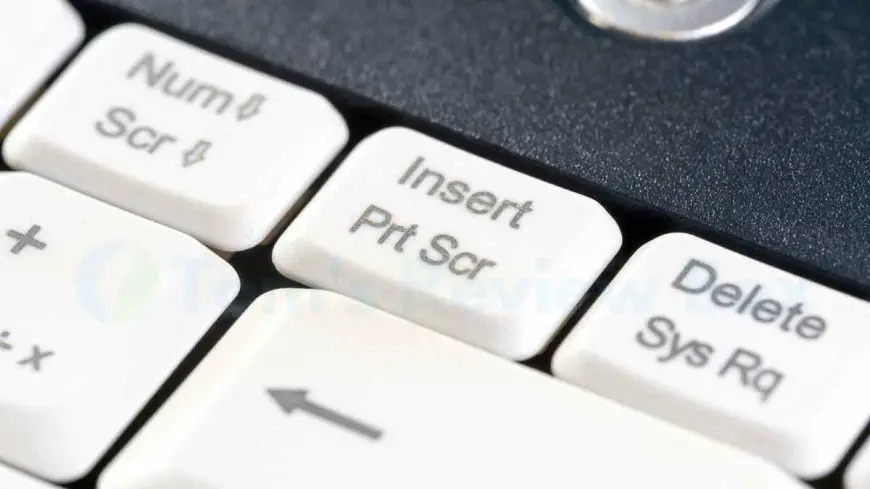
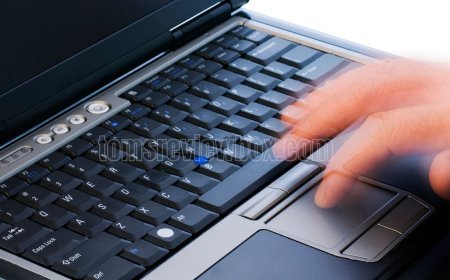
To start, verify the location of the Print Screen key on your laptop keyboard. Ensure it's easily accessible. Check if the necessary modifier keys like Ctrl or Fn are functioning properly for taking screenshots. Look for any specific instructions related to the Print Screen key on your laptop model.
Open Desired Screen
Firstly, navigate to the screen or window you wish to capture before taking a screenshot. Make sure that the content you want to screenshot is fully visible and correctly arranged on your laptop screen. Confirm that the screen you intend to capture is active and in focus.
Step-by-Step Screenshot Guide
Using Print Screen Key
Press the Prt Sc key to capture the entire screen on your laptop. Experiment with different key combinations such as Fn + Prt Sc or Alt + Prt Sc to access additional screenshot functionalities. Familiarize yourself with the basic operation of the Print Screen key for taking screenshots.
Capturing Active Window
Utilize the Alt key in combination with Prt Sc to capture the currently active window. Learn how to focus on specific windows or applications by using this method for targeted screenshots. Master the technique of capturing individual windows using these essential key shortcuts.
Saving Your Screenshot
Understand how to save the captured screenshot from the clipboard to your desired location on your laptop. Explore different methods of saving screenshots based on the operating system you are using, whether it's Windows, macOS, or Linux. Ensure that you have a designated folder or location to store your screenshots for easy access.
Advanced Screenshot Techniques
Snipping Tool Use
The Snip & Sketch tool in Windows 10 offers advanced screenshot features for users. With this tool, you can easily take full-screen, window-specific, or customized area screenshots. By utilizing the Snipping Tool, you can capture precisely what you need on your laptop screen. You can conveniently copy screenshots to the clipboard directly from the Snip & Sketch tool.
Shortcut Commands
Exploring shortcut commands for taking screenshots in KDE and GNOME environments can significantly enhance your efficiency. These key combinations allow you to access screenshot tools with various options quickly. By mastering these commands, you can achieve quick and efficient screenshot capture whenever needed.
Editing and Sharing Screenshots
Basic Editing Tips
Enhance your screenshots with basic editing techniques to make them more informative and visually appealing. Use features like cropping, annotating, and highlighting to focus on key details. These tools are essential for refining your screenshots before sharing them with others.
Within screenshot applications, you can find simple editing tools that allow you to make quick modifications to your images. These tools typically include options for adding text, shapes, arrows, or blurring sensitive information. Familiarize yourself with these functions to improve the quality of your screenshots.
Cropping, annotating, and highlighting are crucial actions when working with screenshots. Crop out unnecessary elements to direct the viewer's attention, add annotations to provide context or explanations, and highlight important areas for emphasis. Mastering these techniques will help you create professional-looking screenshots.
Sharing Options
When it comes to sharing screenshots, there are various methods you can explore based on your needs. Attach screenshots directly to emails or messages for clear communication in work or personal settings. This method is efficient for providing visual references or instructions.
Online platforms offer convenient ways to upload and share your screenshots with a wider audience. Websites like Imgur, Dropbox, or Google Drive allow you to store and share images securely. By utilizing these platforms, you can easily distribute your screenshots for collaboration or feedback purposes.
Consider using cloud storage services such as OneDrive or iCloud for seamless sharing across devices. These services enable you to access your screenshots from anywhere and share them effortlessly with others. Embrace the versatility of cloud storage for convenient screenshot management.
Troubleshooting Common Issues
Print Screen Not Working
If the Print Screen key is not functioning, it can be frustrating. Potential reasons for this issue include system errors or software conflicts. To resolve, try restarting your laptop to refresh the system.
List of solutions:
-
Restart your laptop to reset any system glitches causing the Print Screen key malfunction.
-
Update your keyboard drivers to ensure they are compatible with capturing screenshots.
-
Use alternative screenshot tools like Snipping Tool or third-party software as a workaround.
When Print Screen key malfunctions, it may be due to outdated drivers or incompatible settings. Ensure your keyboard drivers are up-to-date and compatible with taking screenshots. Consider using Snipping Tool as an alternative method.
File Saving Problems
Saving screenshot files can present challenges, such as compatibility issues or storage errors. To overcome these obstacles, check the file format and storage location settings before saving. Ensure that the file format is supported by your laptop's software.
List of solutions:
-
Check the file format when saving screenshots to ensure compatibility with editing and sharing programs.
-
Verify the storage location to prevent errors in saving files on your laptop.
-
Consider changing the file format or storage location if issues persist when saving screenshots.
When encountering file saving problems, confirm that the file format is supported by your editing software. Check the storage location to avoid any errors in saving screenshots on your laptop. If issues persist, consider adjusting the file format or storage settings.
Final Remarks
You've now mastered the art of taking screenshots on your laptop. From understanding the basics to troubleshooting common issues, you're equipped with all the knowledge you need. Whether you're capturing a funny meme, saving important information, or sharing work-related content, taking a screenshot is now a breeze for you.
Keep practicing and exploring the advanced techniques mentioned in this guide to elevate your screenshot game. Remember, a picture is worth a thousand words, so make sure your screenshots are clear and convey the message effectively. Now, go ahead and capture those moments effortlessly!
Frequently Asked Questions
How can I understand the importance of taking screenshots?
Screenshots are valuable for capturing important information, saving online receipts, or troubleshooting technical issues. They serve as visual references that can be shared with others easily.
What should I do before taking a screenshot on my laptop?
Before capturing a screenshot, ensure the content you want to capture is visible on your screen. Clear any unnecessary clutter and make sure the area you want to capture is in focus.
Can you provide steps for taking a screenshot on a computer using different ways?
To take a screenshot on your laptop, press the "Print Screen" key to capture the entire screen or use "Alt + Print Screen" to capture only the active window. Open an image editor like Paint and paste the screenshot to save it.
Are there advanced techniques I can use for taking screenshots on the computer?
Advanced techniques include using Snipping Tool or Snip & Sketch for precise selections, capturing drop-down menus with third-party tools, or utilizing keyboard shortcuts like Windows Key + Shift + S for gaming screenshots.
How can I edit and share screenshots effectively?
You can edit screenshots by cropping, adding annotations, or highlighting areas of interest using built-in tools like Paint or dedicated software like Snagit. Share screenshots via email, messaging apps, cloud storage services, or social media platforms directly from the editing tool.
What's Your Reaction?














![MacBook Pro M5: All the features and specs you need to know [LEAKS REVEALED]](https://tomsreviewbox.com/uploads/images/202502/image_430x256_67bd6d7cd7562.jpg)
