![MacBook Pro M5: All the features and specs you need to know [LEAKS REVEALED]](https://tomsreviewbox.com/uploads/images/202502/image_430x256_67bd6d7cd7562.jpg)


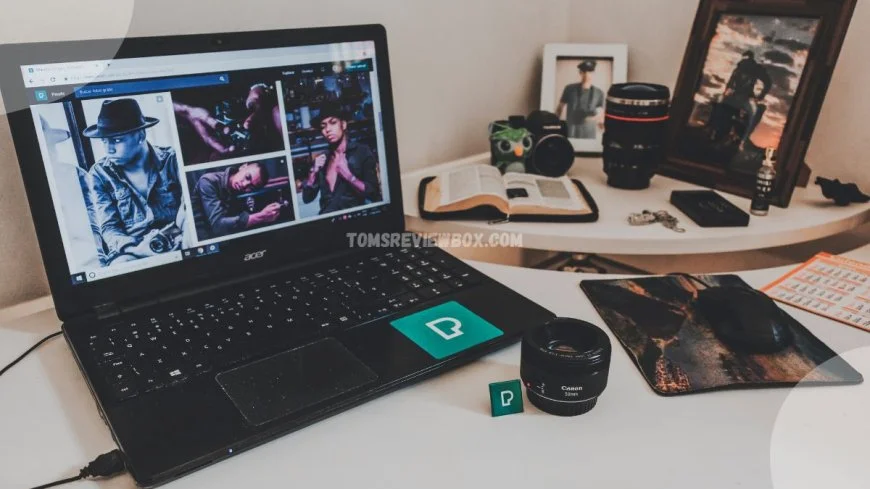
How to Screenshot Acer Laptop: 6 Simple Methods Explained
Learn how to screenshot Acer laptops with our comprehensive guide. We provide 6 easy methods for capturing screenshots on your Acer device.
Need to capture what's on your Acer laptop screen? Learning how to screenshot an Acer laptop using the windows snipping tool for quality screenshots is simpler than you think, including sketch screenshots in the snipping window. Whether you're using a screenshot utility to share a funny meme, saving important info with a screenshot maker, or creating tutorials with a screen snip, knowing this skill can save you time and effort.
From using keyboard shortcuts on a computer or tablet to built-in tools, there are several steps that make taking pictures and screenshots easy and efficient. This guide will walk you through the best ways to grab your screen content quickly using a screenshot utility, a screenshot program, and EaseUS Screenshot on your tablet. Get ready to master the art of screenshots, picture steps, and enhance your digital communication skills today on your tablet with a recorder!
Using Print Screen
Print Screen Key
The Print Screen key is usually located in the top row of your Acer laptop keyboard, allowing you to use a screenshot program like EaseUS Screenshot to capture a picture on your tablet. It may be labeled as "PrtSc" or "PrntScrn." This key allows you to capture a picture screenshot of your entire screen in one step at the top with Movavi. Pressing the print screen button alone takes a screenshot program snapshot but does not save it as a picture file.
Using the Print Screen key in combination with other keys is a top step in how you capture screenshots. For instance, pressing the print screen button, Alt + PrtSc, captures a screenshot of only the active window. Alternatively, using Windows + PrtSc saves the full screenshot directly to your computer.
Save Screenshot
Screenshots can be saved directly to your clipboard or as image files. When you press the Print Screen key, the screenshot image goes to the clipboard first. You can paste the screenshot into programs like Paint or Word by pressing Ctrl + V after using Movavi Screen Recorder.
For saving screenshots as files, use Windows + PrtSc. This method automatically saves your screenshot in the "Screenshots" folder under "Pictures." Knowing where your screenshots are saved helps you find them quickly later on.
Edit Screenshot
Editing screenshots enhances their clarity and usefulness. Built-in tools like Paint allow you to add annotations or highlights to a screenshot captured with Movavi Screen Recorder. Open Paint and paste your screenshot using Ctrl + V.
You can draw shapes or write text on your screenshot image for better understanding using Movavi Screen Recorder. After editing, save your work as a screenshot in various formats such as PNG or JPEG. Choose a format based on how you plan to use the screenshot.
Snipping Tool Method
Open Snipping Tool
Access the Snipping Tool from the Windows Start menu. Click on the search bar and type "Snipping Tool" for a screenshot. This will bring up the application quickly.
Familiarize yourself with the interface and options available in the Snipping Tool to take a screenshot. The main window shows several buttons like "New" and "Mode," which can be captured in a screenshot. Each button serves a specific purpose.
Understand how to quickly launch the Snipping Tool for efficient screenshot capturing. You can also pin it to your taskbar for easy access, like a screenshot. This saves time when you need to take a screenshot frequently.
Capture Area
Select specific areas of your screen to capture a screenshot using the Snipping Tool. Click on "New" to start a new snip. A crosshair cursor will appear, allowing you to choose what part of your screen to capture for a screenshot.
Experiment with different screenshot snipping modes to find what works best for you. The options include Free-form, Rectangular, Window, and Full-screen screenshot snips. Each mode captures different types of screenshots based on your needs.
Learn how to adjust the capture area before taking a screenshot. You can drag the cursor to create a rectangle or free-form shape around the area you want to capture for a screenshot. This flexibility allows you to focus on specific content.
Save Snip
Choose a preferred file format when saving your snipped screenshots. The Snipping Tool allows you to take a screenshot and save images as PNG, JPEG, or GIF files. Select the format that suits your needs best.
Designate a specific folder on your laptop for easy organization of saved screenshots and snips. Creating a folder named "Screenshots" can help keep everything in one place. This makes it easier to find your images later.
Confirm the successful saving of your screenshot snip by checking the designated location. Open the folder where you saved your image or screenshot and ensure it appears there. If it does not, repeat the saving process.
Snip & Sketch Tool
Open Snip & Sketch
Launch Snip & Sketch from the Windows Start menu. You can also use keyboard shortcuts. Press Windows + Shift + S to open the screenshot quickly. The interface features a simple layout. You will see various tools in the toolbar. These tools allow you to capture and edit screenshots easily. Familiarize yourself with these options to enhance your experience.
The toolbar includes buttons for different snipping types. It also has an option to access saved snips. Understanding these features helps you navigate the app effectively. Quickly accessing screenshot capturing and editing options saves time during urgent tasks.
Capture Types
Explore four capture types in Snip & Sketch. These include rectangular, free-form, window, and full-screen screenshot snips. Each type serves different purposes based on your needs.
The rectangular snip lets you select a specific area of the screen for a screenshot. This is useful for focusing on particular content. Free-form snips allow you to draw around what you want to capture on the screen. Window snips capture a specific application window without distractions. Full-screen snips take a screenshot of everything on your screen.
Switching between capture types is easy. Click on the desired option in the toolbar before taking a screenshot. This flexibility allows for precise capturing on screen tailored to your requirements.
Edit and Save
Utilize editing tools in Snip & Sketch after capturing images. You can highlight, annotate, or crop your screenshots using these features. The editing options on the screen make it simple to modify your images as needed.
Once you finish editing, save your screenshots in various formats. Common formats include PNG and JPEG for screen use, which ensure compatibility with most applications. Saving in different formats helps maintain quality based on usage on screen.
Organizing saved screenshots is important for future reference. Create folders on your laptop screen to categorize them by project or topic. This practice makes it easier to find specific images on the screen later.
In summary, Snip & Sketch provides an effective way to take screenshots on your Acer laptop. Launching it on the screen is straightforward, and understanding its features enhances usability. The variety of capture types accommodates different needs on screen, while editing tools add convenience. Proper organization of saved files on the screen ensures quick access when necessary.
Using Keyboard Shortcuts
Windows Key + Print Screen
Pressing the Windows key and the Print Screen button at the same time captures the entire screen. This method is one of the simplest ways to take a screenshot on an Acer laptop. After you press these buttons, the screenshot saves automatically in the "Screenshots" folder within your "Pictures" library.
This shortcut is perfect for quick and efficient full-screen captures. It allows users to grab everything visible on their screen display without any extra steps. For anyone needing to share information or save images quickly on screen, this method proves very useful.
Alt + Print Screen
To capture only the active window, use the Alt key along with the Print Screen button. This action copies the screenshot directly to your clipboard. Users can then paste it from the screen into documents or image editing software by pressing Ctrl + V.
This method is ideal for focused screenshot tasks. It avoids clutter by capturing just the currently active application on the screen. For example, if someone needs to share a specific program or webpage on the screen, this shortcut provides a clean and clear image without distractions.
Windows Key + Shift + S
Activating the Snip & Sketch tool can be done using Windows Key + Shift + S. This shortcut gives immediate access to a selection tool that allows users to choose what part of the screen they want to capture. After pressing these keys, a small menu appears at the top of the screen.
Users can select from four options: rectangular snip, freeform snip, window snip, and full-screen snip. This flexibility enhances your screenshot workflow significantly. For instance, if someone wants to highlight a specific section of a website or document on their screen, they can do so easily with this method.
These keyboard shortcuts make taking screenshots on an Acer laptop straightforward and efficient. They provide various options depending on what you need to capture on screen. Whether it's the entire screen or just a single window, there’s a shortcut for that.
In summary, mastering these keyboard shortcuts on screen can improve productivity and streamline your work process. Each method serves a different purpose but offers easy ways to capture important information on your screen. By utilizing these techniques on screen, anyone can enhance their ability to communicate effectively through visuals.
Taking Screenshots on Acer Tablets
Power + Volume Down
Acer tablets offer a simple way to capture screenshots. Press the Power and Volume Down buttons together. This method works well for Acer laptops with touchscreens.
Using this combination allows users to take quality Acer screenshots without needing keyboard shortcuts. This is especially helpful in tablet mode. Users can easily capture screen images while navigating apps or browsing the web.
After pressing the buttons, a quick flash appears on the screen. This indicates that the screenshot has been taken successfully. The image saves automatically to the device's gallery or screenshots folder.
This method is intuitive and straightforward. It does not require any additional software, screen, or settings adjustment. Just press the buttons, and you are done.
Using Stylus
Acer laptops equipped with a touchscreen often support stylus functionality. Utilizing a stylus provides more precision when taking screenshots. It enhances the overall experience of capturing images.
With a stylus, users can easily select specific areas of the screen. This feature is beneficial for making detailed annotations or edits on captured images on the screen. For example, users can highlight important information or draw notes directly on the screenshot.
To use a stylus effectively, open your preferred screenshot tool first. Many Acer tablets come with built-in tools on the screen that make this process easier. Once the tool is open, select the screen area you want to capture using the stylus.
The integration of stylus functionality adds versatility to screenshot capturing. Users can combine writing and drawing with their screenshots seamlessly. This capability is useful for students and professionals alike.
Locating Saved Screenshots
Default Save Location
Screenshots taken on your Acer laptop usually save in specific folders. The default save location is typically the "Pictures" folder. This is where most screenshots end up when you use standard keyboard shortcuts or built-in tools.
Different methods may save screenshots in varying locations. For instance, using the Snipping Tool or Snip & Sketch might direct screenshots to a different area. Always check the screen settings of these tools to find out where they store files.
To access your screenshots easily, confirm the default folder settings. Navigate to "This PC," then select "Pictures." Look for a folder named "Screenshots." If you used keyboard shortcuts like Windows + Print Screen, your images should be here.
Changing Save Location
Customizing the save location for your screenshots can help keep things organized. You can change where your Acer laptop saves these files on the screen. Many screenshot tools allow you to adjust this setting.
Explore the settings in screenshot tools like Snip & Sketch or Movavi Screen Recorder. In these applications, look for an option labeled “Save As” or “File Location.” Here, you can choose a new folder to store your screenshots.
Organizing screenshots in a personalized folder structure offers several benefits. It makes finding specific images easier. Instead of searching through multiple folders, you can have all your screenshots in one designated place.
Consider creating separate folders for different projects or topics. For example, if you take screenshots for schoolwork and personal use, create two folders: one for "School" and another for "Personal." This way, it’s simple to locate what you need without wasting time.
Troubleshooting Issues
Common Problems
Users often face several issues when trying to take screenshots on Acer laptops. One common problem is the Print Screen key not working. This may happen due to software conflicts or incorrect keyboard settings.
Another issue involves not finding saved screenshots in the expected location. Screenshots typically save to the "Pictures" folder, but sometimes they end up in other folders. Users might also encounter problems with the Snipping Tool or Snip & Sketch applications crashing or failing to capture images.
Limitations exist with certain methods. For example, some laptops may not support capturing screenshots using specific keyboard shortcuts. This can lead to frustration for users who rely on those shortcuts.
Solutions
Effective solutions can resolve these common screenshot problems on Acer laptops. First, check if the Print Screen key works by testing it in different applications. Pressing "Fn" + "Print Screen" may help if the key alone does not function.
If users face issues with the Snipping Tool, updating Windows can solve many bugs. Ensure that all system updates are installed. Restarting the laptop may also fix temporary glitches affecting screenshot functionality.
Alternative tools exist for capturing screenshots if built-in methods fail. Third-party applications like Greenshot and Lightshot offer user-friendly interfaces and additional features. These tools allow users to edit and annotate screenshots easily.
Community forums can be a valuable resource for troubleshooting tips and advice. Websites like Reddit and Acer's support forum provide insights from other users who faced similar issues. Engaging with these communities can lead to effective solutions and new ideas.
In summary, users should identify common problems related to taking screenshots on Acer laptops. They can troubleshoot these issues by checking keyboard settings and ensuring software is updated. Exploring alternative tools and seeking help from online forums can further enhance their screenshot experience.
Pensamientos Finales
You now have a solid grasp of different methods to screenshot your Acer laptop and tablets. Whether you prefer using Print Screen, the Snipping Tool, or keyboard shortcuts, each method is easy to master. You've also learned how to locate your saved screenshots and troubleshoot common issues. This knowledge empowers you to capture important information efficiently.
Don't hesitate to put these techniques into practice. Start taking screenshots today to enhance your productivity and communication. Share your newfound skills with friends and colleagues, and help them streamline their own processes. Happy screenshotting!
Frequently Asked Questions
How do I take a screenshot on an Acer laptop?
You can take a screenshot by pressing the Print Screen key. This captures the entire screen. To save it, paste it into an image editor like Paint and save the file.
What is the Snipping Tool?
The Snipping Tool is a built-in Windows application that allows you to take screenshots of specific areas. Open it from the Start menu, choose your snip type, and select the area you want to capture.
How do I use Snip & Sketch?
To use Snip & Sketch, press Windows + Shift + S. Your screen will dim, allowing you to select a portion to capture. The screenshot will be copied to your clipboard for easy pasting.
Are there keyboard shortcuts for screenshots on Acer laptops?
Yes! Press Alt + Print Screen to capture only the active window. You can also use Windows + Print Screen to capture the entire screen and save it automatically in the Pictures folder.
Can I take screenshots on Acer tablets?
Yes, for Acer tablets, press the Power and Volume Down buttons simultaneously. This will capture your screen and save it in the device's photo gallery.
Where can I find my saved screenshots?
Saved screenshots are typically located in the "Pictures" folder under "Screenshots." You can also check your clipboard if you used keyboard shortcuts without saving.
What should I do if my screenshot isn’t saving?
If screenshots aren’t saving, ensure your system is updated. Restart your laptop and check storage space. If issues persist, try using alternative methods like Snipping Tool or Snip & Sketch.
What's Your Reaction?