![MacBook Pro M5: All the features and specs you need to know [LEAKS REVEALED]](https://tomsreviewbox.com/uploads/images/202502/image_430x256_67bd6d7cd7562.jpg)


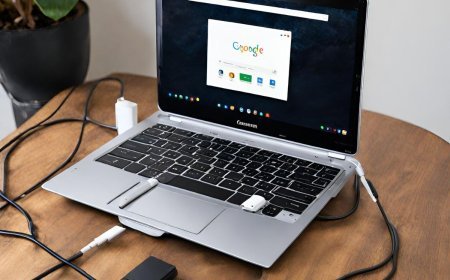
How to Save Pictures on Chromebook: Step-by-Step Guide
Learn how to save pictures on Chromebook with this step-by-step guide. Easily download and find image files on your Chromebook.

Ever wondered how to save pictures on your Chromebook? This tutorial will show you the ropes. Understanding the various methods of saving images, including screenshots, is crucial for anyone using a Chromebook. In this tutorial, we will preview how to save and organize images using Google Photos. From its inception, the Chromebook has offered unique features such as a touchpad and the ability to preview web pages. Additionally, it allows easy access to Google Photos. In this preview, we'll delve into these features and provide a comprehensive guide on how to efficiently download pictures using the tool on your device.
Understanding Chromebook Image Saving
Understanding the basic saving process is crucial. Before saving an image, it's important to consider the file format. You can preview the document and then download it using a tool. For instance, JPEG and PNG are popular formats, each with its own pros and cons.
For example, JPEG is great for photographs on Chrome OS due to its small file size but may compromise image quality. On the other hand, PNG maintains high quality but results in larger file sizes, which can impact performance on chrome os. Consider your specific needs when selecting an appropriate format.
Exploring various options for saving images is essential too. Chromebook offers diverse options such as right-clicking on an image and selecting "Save Image As," or dragging and dropping the image into a designated folder.
Step-by-Step Guide to Saving Images
When you want to save images directly from webpages on your Chromebook, it's essential to utilize the browser tools for efficient image saving. First, on your Chrome OS device, right-click on the image you want to save, then select "Save image as" from the dropdown menu. Choose a location in your file system and click "Save." This ensures that you can easily access and use the saved image whenever needed.
Proper attribution is crucial when saving images from online sources. Always ensure that you have permission or are using images with open licenses such as Creative Commons. Providing proper credit to the original source of the image is not only ethical but also legally required in many cases.
Navigating to Saved Images
File Management
Effective file management is crucial for organizing and accessing your saved images on a Chromebook. By creating folders and categories, you can keep your images neatly arranged for easy retrieval. Utilize the file management tools provided by Chromebook's operating system to create, rename, move, and delete folders as needed.
For example:
-
Create a "Vacation" folder to store all vacation-related images.
-
Use subfolders within the "Vacation" folder for specific trips like "Beach Trip 2021" or "Skiing Trip 2022."
Utilizing these organizational features ensures that you can quickly locate any image without sifting through a cluttered collection.
Using Search Function
The search function on your Chromebook is an invaluable tool for swiftly locating saved images. Leveraging this feature allows you to find specific pictures with ease. Familiarize yourself with advanced search options such as filtering by date, file type, or even color.
Tips for optimizing search queries:
-
If you remember the name of the image or details about it (e.g., location or event), enter relevant keywords into the search bar.
-
Take advantage of filters like "Images," which narrows down results specifically to picture files.
-
Refine your searches further by using modifiers such as "type:png" if you're looking for PNG format images.
Copying and Pasting Images
Shortcuts
Using keyboard shortcuts can significantly expedite the process. By learning essential combinations, you can quickly copy images from a webpage and paste them into your desired location. For instance, pressing "Ctrl + C" allows you to copy an image, while "Ctrl + V" pastes it onto a document or folder.
Customizing these shortcuts based on your preferences can further enhance efficiency. You can assign specific key combinations for copying and pasting images, making the process even more seamless.
For example:
-
Pressing "Alt + C" as a shortcut for copying images.
-
Using "Alt + V" as a quick way to paste copied images into documents or presentations.
Utilizing these keyboard shortcuts not only saves time but also streamlines the image-saving workflow on your Chromebook.
Clipboard Usage
Another useful method for saving pictures involves maximizing the functionality of the clipboard. The clipboard serves as temporary storage for copied content, including images. After copying an image from a webpage using Ctrl + C, you can easily access it by pasting with Ctrl + V in another location.
Understanding how the clipboard facilitates quick transfers is crucial in efficiently managing saved images. It allows you to seamlessly move between different applications without losing copied content, ensuring that your images are readily accessible when needed.
Managing clipboard contents effectively is essential for maintaining organization and accessibility when dealing with multiple saved pictures at once.
Backing Up Camera Photos
When saving pictures on a Chromebook, one method is by connecting external devices. This involves using compatible cables or wireless transfer options to move photos from cameras or smartphones to the Chromebook. For instance, if you have captured memorable moments using your digital camera, you can connect it to your Chromebook via a USB cable for photo transfer.
You might encounter some common issues when connecting devices, such as compatibility problems or difficulties in establishing a stable connection. Troubleshooting these issues involves checking the compatibility of the devices and ensuring that all necessary drivers are installed on both ends for seamless communication.
Another way to save images on your Chromebook is through photo transfer from other devices. You can use USB cables or wireless methods like Bluetooth or Wi-Fi Direct for smooth photo transfer processes. For example, if you've taken photos with your smartphone and want them saved on your Chromebook, simply connect the two devices wirelessly and initiate the photo transfer process.
During photo transfers, it's crucial to ensure data integrity by verifying that all images are successfully copied without any corruption. Checking transferred photos after completion ensures that no data loss occurs during this process.
An essential aspect of saving pictures on a Chromebook is utilizing cloud backup services. It's important to back up saved images to cloud storage platforms for added security and accessibility across different devices within the Chromebook ecosystem.
Exploring cloud backup options integrated with Chromebooks allows users to seamlessly store their precious memories in platforms like Google Drive or Dropbox. These cloud services provide an extra layer of protection against potential device failures or accidental deletions.
Setting up automatic backups for saved images ensures that new photos are continuously synced with cloud storage without manual intervention. This feature provides peace of mind knowing that every image captured is securely backed up in real-time.
Organizing Your Image Files
Creating Albums
Organizing saved pictures on Chromebook can be made easier by creating albums or collections. Utilize the built-in album creation features on your Chromebook to keep your images in order. By grouping similar images together, you can easily locate and view them when needed. For instance, if you have a collection of nature photos, you can create an album specifically for those images.
Thematic or chronological albums offer several benefits. Thematic albums allow you to categorize your pictures based on specific themes such as "family vacations," "nature landscapes," or "food adventures." On the other hand, chronological albums help organize images according to dates, making it convenient for users who want to retrieve photos from a particular period.
Creating thematic or chronological albums not only helps with efficient organization but also enhances the overall user experience by providing quick access to desired images without having to sift through an extensive list of files.
Renaming Files
Renaming saved image files is crucial for better organization and identification purposes. When saving pictures on Chromebook, consider renaming them using clear and descriptive names that reflect the content of each image. This practice ensures that you can quickly recognize the picture based on its file name without having to open it.
Understanding best practices for file renaming is essential in maintaining consistency across all your saved images. Ensure that each file name is unique and relevant so that searching for specific pictures becomes hassle-free.
Streamlining the renaming process through efficient techniques makes managing image files more convenient and time-saving. For example, instead of manually renaming each file one by one, consider using batch-renaming tools available on Chromebook or employing naming conventions where similar types of images are named following a consistent pattern (e.g., YYYY-MM-DD_EventName).
Deleting Unwanted Images
Single Deletion
To delete individual saved images on your Chromebook, you can simply open the Files app, locate the image you want to remove, right-click on it, and select "Delete." Confirm the deletion action by clicking "Move to trash," and voila! The unwanted image is gone. It's important to understand that once an image is deleted from your Chromebook's storage, it goes into the "Trash" folder where it stays for 30 days before being permanently erased. If you realize that you've mistakenly deleted an important picture, don't worry! You can easily recover it within this 30-day period by accessing the "Trash" folder and restoring the image back to its original location.
Deleting single images gives you more control over which files are removed from your device. This method allows you to carefully review each picture before deciding whether or not to delete it. It's a great way to ensure that only unnecessary or outdated images are removed from your Chromebook's storage.
Bulk Removal
. You can efficiently delete multiple pictures by selecting them all at once using either click-and-drag or holding down the “Ctrl” key while clicking on individual images. Once selected, just right-click on any of the highlighted pictures and choose “Delete.” Be cautious when performing bulk removal actions as there is no automatic confirmation prompt for each file; they will be immediately moved to the "Trash" folder without further confirmation.
Bulk removal offers a quick way to free up significant storage space by eliminating a large number of unnecessary pictures with just a few clicks. However, exercising caution is crucial when using this method as there’s no second chance for reconsideration once these files are sent directly into the “Trash” folder.
Tips for Efficient Image Handling
Storage Management
Managing storage is crucial. You can monitor your available space by clicking the system tray, then the Settings gear icon, and finally "Device" and "Storage management." This allows you to see how much space your saved images are taking up. To optimize storage, consider using external drives or cloud services like Google Drive.
Another way to manage storage efficiently is by organizing your saved images into folders. This makes it easier to locate specific pictures without sifting through a cluttered gallery. Utilize the built-in file manager on Chromebook or consider installing third-party file organization apps for a more customized experience.
Editing Tools
Once you've mastered saving images, exploring built-in editing tools can enhance your picture collection. Chromebooks offer basic image editing features like cropping, rotating, and adjusting brightness and contrast right from the Files app. For more advanced edits, explore web-based photo editors such as Pixlr or Adobe Photoshop Express that seamlessly integrate with Chromebook's browser.
Customizing saved images according to your preferences becomes effortless with these editing options. Whether it's adding filters for a vibrant touch or retouching imperfections in portraits, these tools empower you to transform ordinary snapshots into captivating visuals.
Sharing Options
After saving and enhancing your pictures on Chromebook, it's time to leverage various sharing avenues wisely. Social media sharing directly from the Files app streamlines the process of showcasing your favorite captures on platforms like Instagram or Facebook. When sending images via email attachments, ensure they're compressed if necessary to avoid exceeding attachment limits.
To maintain privacy when sharing personal or sensitive images, always double-check sharing settings before posting online or sending via email. Consider utilizing secure channels such as encrypted messaging apps for added protection when sharing confidential visuals with trusted individuals.
Advanced Techniques for Image Saving
External Storage
Utilizing external storage devices like USB drives or SD cards is a great way to save pictures on Chromebook. You can simply plug in a USB drive, locate the image you want to save, and then drag it into the external storage device. This allows you to free up space on your Chromebook while still keeping your images accessible.
When transferring images from your Chromebook to an external storage device, ensure that you are storing them in appropriate folders for easy access later. For example, creating separate folders for different categories of images (e.g., personal photos, work-related images) can help keep things organized.
It's important to remember that while using external storage devices offers convenience and additional space for saving pictures, it's essential to practice best practices for safeguarding data stored in these devices. This includes safely ejecting the external device before removing it from the Chromebook to prevent data corruption or loss.
-
Utilize USB drives or SD cards
-
Organize images into separate folders
-
Safely eject external devices before removal
Cross-platform Transfer
Seamlessly transferring images between your Chromebook and other platforms such as Windows or macOS is crucial if you frequently switch between different operating systems. One effective method is using cloud-based services like Google Drive or Dropbox where you can upload your pictures from the Chromebook and access them from any other platform with internet connectivity.
When engaging in cross-platform transfers, consider compatibility issues that may arise due to differences in file formats between operating systems. For instance, certain image formats might not be fully compatible across all platforms; therefore, converting files into universally supported formats like JPEG can ensure smooth transitions.
In case of encountering challenges during cross-platform transfers—such as inability to open transferred files—it's advisable to troubleshoot by checking file formats and ensuring proper synchronization of cloud-based services across all platforms being used.
Conclusion
You've now mastered the art of saving and managing images on your Chromebook. From understanding the basics to exploring advanced techniques, you're equipped to handle your image files like a pro. Remember, organizing your images and backing them up are crucial for keeping your digital gallery tidy and secure. As you navigate through this visual journey, don't forget to have fun with it! Experiment with different methods and find what works best for you.
Now, go ahead and put your newfound knowledge into action. Start saving those amazing images on your Chromebook and revel in the convenience of having them at your fingertips whenever you need them.
Frequently Asked Questions
How do I save images on a Chromebook?
To save images on a Chromebook, right-click the image and select "Save image as." Choose the location to save the image and click "Save."
Can I back up my camera photos on a Chromebook?
Yes, you can back up your camera photos on a Chromebook using cloud storage services like Google Drive or Dropbox.
How can I organize my saved image files?
You can organize your saved image files by creating specific folders for different categories of images, such as travel, family, or work-related pictures.
Is it possible to copy and paste images on a Chromebook?
Certainly! You can copy an image by right-clicking it and selecting "Copy," then paste it into another application or location using the keyboard shortcut Ctrl + V.
Are there advanced techniques for saving images on a Chromebook?
Absolutely! Advanced techniques include using photo editing apps available in the Chrome Web Store to enhance and modify your saved images.
What's Your Reaction?