![MacBook Pro M5: All the features and specs you need to know [LEAKS REVEALED]](https://tomsreviewbox.com/uploads/images/202502/image_430x256_67bd6d7cd7562.jpg)


How to Replace Acer Laptop Hinges: Easy Disassembly Guide
Learn step-by-step how to replace Acer laptop hinges with our easy hinge repair guide. Fix your Aspire laptop's hinges effortlessly.
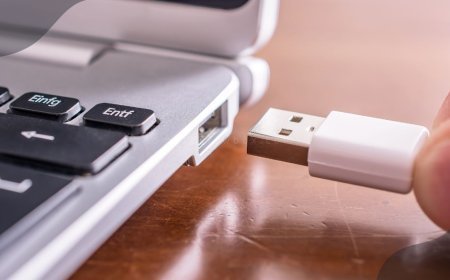
Replacing Acer laptops laptop hinges can feel daunting, but it doesn’t have to be with pliers, touch pad buttons, and a small prying tool. Many users struggle with the idea of self repair for their laptops with an overheating issue instead of visiting a local repair shop. However, tackling this quick fix task can save you time and money while boosting your confidence in handling tech repairs like a laptop hinge or a broken metal part on a ThinkPad T61.
With the right tools and guidance, you can easily self repair by unscrewing and replacing those worn-out hinges as a quick fix or visit a local repair shop. This guide will walk you through each step clearly and simply. You’ll learn what materials, such as screw and metal hinge, you need and how to ensure a smooth process for part and hinge assemblies. Embrace the challenge of fixing the metal hinge and enjoy the satisfaction of DIY repair with every screw and part. Your laptop will thank you for it!
Tools and Preparation
Gather Tools
Collect essential tools for this task. You will need screwdrivers, prying tools, and anti-static brushes for the metal hinge part. A quick fix requires the right equipment. Ensure you have replacement hinges ready. Adhesive and screw may also be necessary to secure the new hinges properly and keep them in par. Organize your tools, including the screw and metal hinge, in a way that allows easy access during the repair process. This saves time and reduces frustration.
Safety Precautions
Power off the laptop before starting. Disconnect it from any power source to avoid accidents. Use an anti-static wrist strap while working. This helps prevent static damage to internal components. Static electricity can harm sensitive parts inside the laptop. Work in a well-lit area to improve visibility. Good lighting helps avoid mistakes and accidents during the repair of the metal hinge, keeping everything up to par.
Workspace Setup
Clear a flat surface to work on the laptop. A clean area prevents losing small parts, like a hinge, during the process. Lay down a soft cloth on the surface. This protects the laptop from scratches while you work. Keep small containers nearby to organize screws, hinge, and other small parts. Proper organization makes it easier to find everything when needed, which can hinge on effective systems.
Disassembling the Laptop
Remove Battery
Locate the battery compartment on the underside of the laptop near the hinge. This is usually marked with a battery symbol. Release the battery latch to unlock it. Carefully slide the battery out of its compartment. Store the battery in a safe place, away from the hinge, to avoid accidental reinstallation. Keeping it away from the laptop hinge prevents any potential damage during disassembly.
Unscrew Bottom Cover
Identify all visible screws securing the bottom cover. These screws can vary in size, so take note of their locations near the hinge. Use a magnetic screwdriver to prevent losing screws during this hinge process. Gently unscrew and remove each screw one by one. After removing all screws, gently pry off the bottom cover at the hinge without damaging clips or tabs. A plastic spudger can help in this hinge step to avoid scratches.
Disconnect Cables
Locate all cables connecting the base to internal components. These cables include power connectors and display cables. Carefully unplug each cable to avoid damage. Use caution as some connectors can be fragile. Label cables if necessary to ensure correct reconnection later. This step is crucial for maintaining organization during assembly.
Disassembling an Acer laptop requires careful attention to detail. Following these steps helps prevent hinge damage and ensures a smooth reassembly process later on. For those unfamiliar with this procedure, searching for hinge disassembly videos online can provide visual guidance. Specific laptops may have unique features, like the hinge, so look for videos that match your model closely.
For instance, if you're working on an Acer Aspire V3, make sure to find resources specific to that model's hinge. Each laptop can have different layouts and components, which affect how you should proceed with disassembly.
If you run a small computer repair business, understanding these steps enhances your skills. Familiarity with various models like the ThinkPad T61 also broadens your knowledge base.
Remember, being organized during disassembly is essential. It minimizes confusion when putting everything back together. Keep a checklist of parts removed and their respective locations.
Removing Keyboard and Cover
Detach Keyboard
Unscrew any screws securing the keyboard to the laptop base. These screws are usually located around the edges of the keyboard. Once unscrewed, use a prying tool to gently lift the keyboard from its position. Start at one corner and slowly work your way around. Be cautious of ribbon cables when detaching the keyboard. These cables connect the keyboard to the motherboard. If pulled too hard, they can break or damage easily.
Lift Top Cover
After detaching the keyboard, gently lift the top cover away from the base. This step requires care to avoid damaging any components underneath. Ensure no cables are still connected before fully removing the cover. Look for any remaining connectors that may hold it in place. Once you confirm everything is free, place the top cover aside in a safe location. Keeping it safe prevents scratches or damage while you work on other parts.
Access Internal Components
Identify the internal components that need access for hinge replacement. These components often include screws and brackets that secure the hinges in place. Take note of the layout to assist with reassembly later. A quick photo can help remember where each part goes back. Avoid touching any sensitive components unnecessarily. Static electricity can damage parts like RAM or the motherboard.
After completing these steps, you will have clear access to your laptop’s hinges. This process requires patience and attention to detail. Each step is crucial for a successful hinge replacement.
Taking Out the Motherboard
Unscrew Motherboard
Locate the screws securing the motherboard to the laptop base. These screws are typically found around the edges of the motherboard. Remove each screw carefully. Keep track of their original positions to ensure proper reassembly later. Use a magnetic tray if possible. Support the motherboard while unscrewing it. This prevents bending or damaging it during the process.
Disconnect Connections
Identify all connections attached to the motherboard. Look for cables and connectors that link to various components, such as the display and hard drive. Unplug these connectors gently. Pulling too hard can break them. Take a photo of each connection before unplugging them. This will serve as a reference during reassembly, making it easier to reconnect everything correctly.
Carefully Remove Board
Lift the motherboard out of the laptop base with care. Avoid pulling on any attached components or cables while doing this. It’s crucial to be gentle to prevent any damage. Once free, place the motherboard on a static-free surface for safety. A non-static surface helps protect sensitive electronic parts from static electricity damage.
Display Component Removal
Unscrew Display Bezel
Locate the screws around the display housing. These screws hold the bezel in place. Use a small screwdriver to remove them carefully. After unscrewing, take a prying tool and gently detach the bezel from the screen. Start at one corner and work your way around. Be cautious not to damage the display or surrounding components during this process. A little patience goes a long way here.
Detach Screen Assembly
Once the bezel is removed, lift the screen assembly away from the laptop base. This step requires care. Ensure that all connections are disconnected before fully removing it. Look for any clips or connectors that may still be attached. After confirming everything is free, place the screen assembly on a soft surface. This prevents scratches and keeps it safe while you work on other components.
Disconnect Display Cables
Next, identify and unplug the display cables connecting the screen to the motherboard. These cables carry signals between the display and other parts of the laptop. Handle them gently to avoid damage. If needed, label each cable as you disconnect it. This makes reconnection easier when you put everything back together. Keeping track of where each cable goes saves time later.
Reattaching Brass Inserts
Identify Loose Inserts
Inspect the hinge area closely. Look for any loose inserts or components that may have become detached. Pay attention to the condition of each insert. Note any damaged or worn inserts that may require replacement. It is essential to ensure all inserts are accounted for before proceeding with repairs. Missing parts can lead to further issues down the line.
Apply Adhesive
Choose an appropriate adhesive for this task. Use a strong adhesive designed for metal components. Apply a thin layer to secure any loose inserts in place. Avoid using too much adhesive, as excess could interfere with other components. Follow the manufacturer’s instructions regarding application and drying times. Allow the adhesive to set fully before moving on to the next step.
Reattach Inserts
Position the inserts back into their original locations carefully. Press firmly on each insert to ensure they adhere properly to the surface. Check that all inserts are secure before proceeding with reassembly. This step is crucial for maintaining the integrity of the hinges. A well-secured insert prevents future problems such as wobbling or breakage.
Replacing the Hinges
Remove Old Hinges
Start by unscrewing the old hinges from both the screen and the base of the laptop. Use a suitable screwdriver to avoid stripping the screws. Carefully detach the hinges from their mounting points.
Inspect the old hinges for any signs of wear or damage. Look for cracks, rust, or bending. These issues can affect the performance of your laptop. Dispose of the old hinges responsibly. Many electronics stores have recycling programs for such parts.
Install New Hinges
Next, align the new hinges with the mounting points on both the screen and base. Ensure they fit snugly into place. Secure each hinge with screws, making sure they are tight but not over-tightened. Over-tightening can lead to further damage.
After installing, check the movement of the hinges. Open and close the laptop to ensure smooth operation. If they feel stiff or misaligned, adjustments may be necessary.
Secure Hinges Properly
Double-check that all screws holding the hinges are securely fastened. Loose screws can cause instability in hinge assemblies. Test the hinge movement again to confirm proper alignment and function.
If you notice any issues during testing, make adjustments as needed. This could involve repositioning a hinge slightly to ensure it operates smoothly. Properly secured hinges will enhance durability and functionality.
Reassembly Process
Reattach Motherboard
Positioning the motherboard correctly is essential. Place it back into the laptop base with care. Align it with the screw holes. This ensures a secure fit. Reconnect any necessary cables to their respective ports. Each cable must go to its original location. Once everything is in place, use screws to secure the motherboard. Tighten them firmly but avoid over-tightening, which can damage components.
Connect Cables
Reconnect all previously disconnected cables to the motherboard. Use notes or photos taken during disassembly for guidance. This helps in remembering where each cable belongs. Ensure that no cables are pinched or obstructed during reassembly. Properly connected cables improve functionality and prevent future issues. Check each connection twice to confirm they are secure.
Reassemble Keyboard and Cover
Reassembling the keyboard requires careful attention. Position it back into its designated area and secure it with screws. Ensure that all screws are tightened evenly for a stable setup. Next, reattach the top cover of the laptop. Engage all clips around the edges to ensure a snug fit. This step is crucial as loose covers can lead to damage over time.
After securing the top cover, it's wise to check for any loose parts. A thorough inspection prevents problems later on. Look for any screws or components that might have come loose during the process.
Following these steps completes the self-repair of your Acer laptop hinges. The entire disassembly process should have prepared you for this moment. With patience and attention to detail, you can successfully put your laptop back together.
Final Cleaning Steps
Clean External Surfaces
Wipe down the exterior of the laptop with a soft cloth. This step removes dust and grime that can accumulate during repairs. Use appropriate cleaning solutions, such as isopropyl alcohol or a mild detergent. Avoid harsh chemicals to prevent damage to the surfaces.
Ensure all fingerprints and smudges are removed for a polished look. A clean exterior not only improves appearance but also helps in maintaining the laptop's condition. Take care around ports and openings to prevent moisture from entering.
Clean Keyboard
Use a small brush and wet wipes to clean the keyboard thoroughly. This process helps eliminate crumbs and dust that settle between keys. Pay attention to each key, ensuring no debris remains.
Remove any debris or dust from between the keys carefully. You can use compressed air to blow out particles stuck under the keys. Ensure the keyboard is dry before reassembly. Moisture can cause malfunction once the laptop is powered on again.
Final Inspection
Conduct a thorough inspection of the laptop to ensure all components are secure. Check that screws are tightened and hinges are properly aligned. Test the hinges and overall functionality of the laptop by opening and closing it several times.
Confirm that no tools or materials are left inside the laptop before powering on. This step prevents potential damage caused by foreign objects during operation. A careful inspection ensures everything is in place for safe use.
Final Remarks
Replacing your Acer laptop hinges can seem daunting, but with the right tools and steps, you can tackle it like a pro. You've learned how to disassemble your laptop, remove components, and finally swap out those pesky hinges. Each step is crucial for ensuring your laptop functions smoothly and maintains its sleek design.
Now that you’re equipped with this knowledge, don’t hesitate to dive in. Your laptop deserves the best care. If you run into any issues or have questions, reach out to online forums or tech communities for support. Happy repairing!
Frequently Asked Questions
How do I know if my Acer laptop hinges need replacing?
If your screen wobbles, is misaligned, or the hinges are visibly damaged, it's time to replace them. Listen for creaking sounds when opening or closing the lid.
What tools do I need to replace Acer laptop hinges?
You'll typically need a screwdriver set, plastic pry tools, and tweezers. A magnetic mat can help keep screws organized during disassembly.
Can I replace the hinges myself?
Yes, if you're comfortable with basic laptop disassembly. Follow a step-by-step guide carefully, and ensure you have the right tools.
Where can I buy replacement hinges for my Acer laptop?
You can find replacement hinges on online marketplaces like Amazon or eBay. Check Acer’s official website or authorized repair centers for genuine parts.
How long does it take to replace laptop hinges?
Replacing hinges usually takes about 1 to 2 hours, depending on your experience level and the complexity of your laptop model.
Will replacing the hinges void my warranty?
If your laptop is still under warranty, self-repair may void it. Always check your warranty terms before proceeding with repairs.
What should I do after replacing the hinges?
After replacing the hinges, reassemble your laptop carefully. Perform a thorough cleaning and check all functions to ensure everything works correctly.
What's Your Reaction?


![How to Fix Acer Laptop Black Screen Issue [Causes & Solutions]](https://tomsreviewbox.com/uploads/images/202408/image_430x256_66ab529c8a89f.jpg)