![MacBook Pro M5: All the features and specs you need to know [LEAKS REVEALED]](https://tomsreviewbox.com/uploads/images/202502/image_430x256_67bd6d7cd7562.jpg)


How to Remove Acer Laptop Battery: Replace Your Aspire E15 Battery
Learn the step-by-step process to remove the Acer laptop battery safely and efficiently. Replace your Acer Aspire E15 E5-576-392H battery hassle-free.
Did you know that nearly 30% of laptop issues in modern notebook computers stem from internal battery problems, including new batteries and removable batteries? If you own an Acer laptop with removable batteries, knowing how to remove the battery can save you time and money, especially when replacing it with new batteries in modern notebook computers or dealing with internal batteries. Whether you're troubleshooting modern notebook computers or upgrading the laptop screen, it's essential to understand the process and link it to the user agreement. Removing the removable batteries can help reset your device and improve performance with a phillips screwdriver and new batteries.
This guide will walk you through the steps in a straightforward manner. You’ll learn tips for safely handling your notebook computers, managing battery drivers, ensuring your password is secure, and making sure everything runs smoothly afterward. No need for fancy tools like a phillips screwdriver or complicated jargon—just simple instructions, your name, email, and password to get the job done. Let’s dive in and make your Acer notebook computers work better than ever with the right battery drivers, email settings, and password management!
Tools Needed
Essential Tools
A Phillips screwdriver is essential for removing screws from your Acer laptop, especially for accessing internal batteries in notebook computers. Most laptops, including the Acer Nitro series, use Phillips screws for accessing internal batteries and performing a power reset. Make sure to choose the right size for your model. This will prevent stripping the screws, damaging the device, and affecting the internal battery.
A plastic spudger is also crucial. It helps pry open the back cover to access the internal battery without scratching or breaking it. Use the spudger gently along the edges of the laptop, especially if you need acer support for your password. This will help you avoid damage to any internal components.
Prepare a clean cloth as well. After removing the battery, place it on this cloth. This protects the battery from dirt and scratches. Keeping everything organized makes reassembly easier later.
Optional Tools
You might want to consider using a magnetic tray. This tool holds screws securely while you work. Losing small screws can be frustrating. A magnetic tray keeps everything in one place.
Tweezers are helpful too. They assist in handling small components or connectors inside the laptop. If a connector is hard to reach, tweezers make it easier to grip and pull out.
Keeping a flashlight handy can improve visibility inside the laptop. Some areas may be dark, making it hard to see what you're doing. A flashlight can illuminate these spaces, helping you avoid mistakes.
Safety Precautions
Always ensure that your device is powered off before starting any work. Remove any connected power cables and peripherals as well. This step is crucial for your safety and prevents damage to hardware.
Ground yourself to prevent static electricity buildup. You can touch a metal object or use an anti-static wrist strap if available. Static electricity can harm sensitive components inside your laptop.
Steps for Battery Removal
-
Power off your Acer laptop completely.
-
Disconnect all cables and peripherals.
-
Use the Phillips screwdriver to remove the back cover screws.
-
Carefully lift off the back cover using a spudger.
-
Locate the battery and disconnect any cables attached.
-
Remove screws holding the battery in place.
-
Lift out the battery carefully.
-
Place it on a clean cloth to avoid damage.
Following these steps ensures safe removal of your battery while minimizing risks to your device.
Safety Measures
Power Down Laptop
Shut down the laptop completely before starting the process. This step is crucial for safety. Unplug the power adapter to ensure no electricity is flowing. Disconnecting from power prevents electrical shocks. Wait a few minutes after shutdown to allow any residual power to dissipate. This ensures that all components are safe to handle.
Work on Flat Surface
Choose a stable, flat surface to prevent accidents. A solid workspace keeps the laptop secure while you work. Ensure good lighting to see all components clearly. Proper lighting helps avoid mistakes during the battery removal process. Avoid working on carpets to reduce static electricity risks. Carpets can build up static, which may damage sensitive laptop parts.
Use Anti-Static Wristband
Wear an anti-static wristband to prevent static damage. This simple tool protects your laptop's internal components. Connect the wristband to a grounded surface while working. Grounding allows any static charge to safely discharge away from you and the laptop. Remove any jewelry that could create static electricity. Metal can attract static, increasing the risk of damage.
Accessing the Battery
Locate Battery Compartment
Finding the battery compartment is the first step. Refer to your laptop's manual for guidance. Manuals usually contain diagrams and specific instructions.
Screws secure the back cover of the laptop. Identify their locations to proceed safely. Look for labels or icons that indicate where the battery area is. These can often help you locate the compartment quickly.
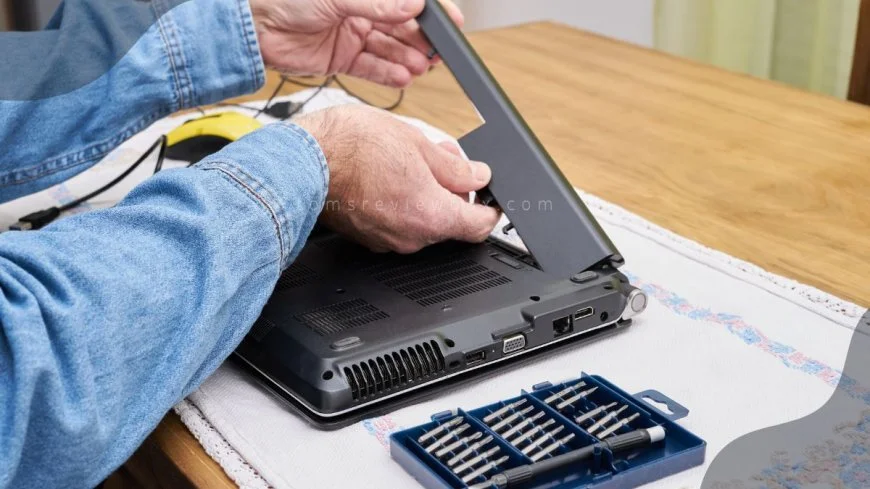
Remove Back Cover
Next, unscrew the screws holding the back cover in place. Use a suitable screwdriver to avoid damaging them.
After removing the screws, gently pry open the back cover using a plastic spudger. This tool helps prevent scratches on your laptop's surface. Be careful not to apply too much force, as this can break clips or damage components.
Keep track of screws and their locations during this process. Organizing them will simplify reassembly later.
Identify Battery Type
Once the back cover is removed, look for the battery model number printed directly on the battery itself. This information is crucial for replacement.
Verify the battery type to ensure compatibility with replacements. Using an incompatible battery can lead to performance issues or even damage your laptop.
Check your laptop manual for specifications on battery types as well. It often lists compatible batteries and their details.
Removing the Battery
Disconnect Battery Cable
Locate the multicolored cables connected to the battery. These wires are crucial for battery function. Carefully unclip or unscrew the battery cable from the motherboard. This step ensures that there is no power running through the device. Always ensure the laptop is powered off before disconnecting the cable. This prevents any electrical issues or damage.
Release Battery Latches
Identify the latches or clips securing the battery in place. These latches keep the battery firmly attached to the laptop. Gently push or pull the latches to release the battery. Some models may require more force than others, but be cautious not to break them. Ensure all latches are fully disengaged before attempting to remove the battery. Missing this step can make removal difficult.
Lift Out Battery
Carefully lift the battery out of its compartment. Hold it by its edges to avoid touching any sensitive components. Avoid forcing the battery if it does not come out easily. Forcing it can damage both the battery and the laptop itself. Place the removed battery on a clean, non-static surface. This helps prevent any static electricity from harming electronic parts.
Safety is essential during this process. Using tools like a plastic spudger can help with disconnection without causing damage. Always remember to wear an anti-static wrist strap if available. This reduces risks associated with static electricity.
Follow these steps carefully for a successful Acer laptop battery removal process. Each model may have slight variations, so consulting your user manual can provide additional guidance.
Precautions During Removal
Avoid Sharp Objects
Using sharp tools can lead to damage. They may harm internal components of the laptop. Always keep sharp objects away during the battery removal process.
Handling tools carefully is crucial. Accidental injuries can happen if you are not cautious. A simple slip with a screwdriver can scratch or puncture sensitive parts inside your laptop.
Handle with Care
Holding the battery properly is important. Use only the edges when lifting it out. This prevents damage to the circuits on the battery and the laptop.
Touching battery terminals can create problems. It may cause short circuits, which can be dangerous. Always avoid direct contact with these terminals.
Once removed, store the battery safely. Place it in a secure spot until you are ready to install it again. A safe location will prevent accidental drops or damage while waiting for installation.
Check for Residual Charge
Before handling the battery, check for any remaining charge. Use a multimeter to test the battery voltage. This step ensures that the battery does not have any residual energy left.
After removing the battery, wait a few minutes. This allows any remaining charge to dissipate. Batteries can hold a charge even after being disconnected from power sources.
Be cautious when dealing with batteries that may still hold a charge. If you notice any signs of swelling or leakage, do not attempt to handle them without proper protection.
Installing a New Battery
Check Compatibility
Confirming the compatibility of the new battery is essential. The new battery must match the specifications of the old one. Cross-reference the battery model with manufacturer guidelines to ensure it fits your laptop.
Check for the correct voltage and capacity. Each Acer laptop requires specific power levels. Using an incompatible battery can damage your device or cause it to malfunction.
Insert New Battery
Aligning the new battery correctly is crucial. Position it with the connectors in the compartment. Gently slide the battery into place without forcing it. Forcing can damage both the battery and the laptop.
Ensure that the battery sits securely in its designated spot. A loose connection may lead to power issues later on. Proper alignment helps maintain a stable connection.
Secure Battery Latches
Securing the battery latches is an important step. Press down on the battery to engage the latches or clips. Listen for a click sound, which indicates they are locked in place.
Verify that all latches click into position to secure the battery properly. A secure attachment prevents accidental disconnections during use. Double-check that the battery is firmly attached before proceeding.
Reconnect Battery Cable
Reconnect the multicolored battery cable to the motherboard next. This step ensures that power flows from the new battery to your laptop's components. Ensure that this connection is snug and secure to avoid any power issues.
Before connecting, double-check the orientation of the cable. Incorrect connections can lead to short circuits or other electrical problems. Taking time to verify these details promotes safe operation.
Reassembling the Laptop
Replace Back Cover
Align the back cover with the laptop casing. The acer aspire e15 model and other modern notebook computers have specific grooves for this purpose. Press down gently to snap the cover back into place.
Ensure all edges are flush and properly seated before screwing. Gaps can lead to dust entering the laptop, which may affect performance. Pay attention to any clips or latches that need securing.
Tighten Screws
Reinsert and tighten all screws removed from the back cover. Each screw plays a role in holding the laptop together. Use a consistent pattern to ensure even pressure across the cover.
Avoid overtightening, which could damage the casing. Stripped screws can cause issues later. If you notice any resistance while tightening, stop immediately.
Power On Laptop
Reconnect the power adapter and turn on the laptop. This step is crucial after installing a new battery in your acer aspire or aspire v5. Observe any startup indicators to ensure proper functioning.
Listen for unusual sounds that may indicate installation issues. A whirring sound could mean a loose connection inside. If everything seems normal, proceed to check battery life and performance.
Testing the New Battery
Check Battery Status
After reassembling the laptop, checking the battery status is crucial. Navigate to the battery settings in your operating system. This can usually be found in the Control Panel or System Preferences.
Verify that the new battery is recognized by the system. Look for details like battery percentage and charge level. If there are any error messages, take note of them. These messages can indicate potential issues with battery health. It's important to ensure everything is functioning correctly before proceeding further.
Perform a Full Charge Cycle
A full charge cycle helps optimize performance. Start by charging the new battery to 100%. This ensures that it reaches its maximum capacity. Once fully charged, allow the battery to discharge completely. This means using your laptop until it shuts down due to low power.
After it discharges, recharge it again to 100%. Repeat this process a few times. Doing so helps calibrate the battery accurately. Calibration allows the system to understand the true capacity of the battery over time.
These steps are essential for maintaining battery health and ensuring longevity. A well-calibrated battery performs better and lasts longer under regular use.
Closing Thoughts
Removing the battery from your Acer laptop is straightforward if you follow the steps outlined. You’ve gathered your tools, ensured safety, accessed the battery, and reassembled everything correctly. Testing the new battery confirms that your laptop is back in action. This DIY task not only saves you money but also enhances your tech skills.
Now that you’re equipped with this knowledge, don’t hesitate to tackle other maintenance tasks. Regular upkeep can extend your laptop's life and improve performance. Share this guide with friends or family who might need it. Take charge of your tech today!
Frequently Asked Questions
How do I know if my Acer laptop battery needs to be replaced?
If your laptop shows reduced battery life, unexpected shutdowns, or swollen casing, it may need replacement. Monitor performance regularly for signs of wear.
Can I remove the battery from any Acer laptop model?
Not all Acer laptops have removable batteries. Check your specific model’s manual or Acer’s website for guidance on battery removal.
What tools do I need to remove an Acer laptop battery?
Typically, you will need a small Phillips screwdriver and possibly a plastic prying tool. Ensure you have the right tools before starting.
Are there any safety measures I should take before removing the battery?
Yes, always power off your laptop and unplug it from any power source. Ground yourself to prevent static discharge that could damage components.
How long does it take to remove and replace an Acer laptop battery?
The entire process usually takes about 15-30 minutes, depending on your experience level. Take your time to ensure safety and accuracy.
Can I install a third-party battery in my Acer laptop?
While it's possible, using an OEM (original equipment manufacturer) battery is recommended for compatibility and safety. Third-party options may void your warranty.
How can I test the new battery after installation?
After reassembling your laptop, power it on and check the battery status in your operating system settings. Ensure it charges properly and holds a charge during use.
What's Your Reaction?