![MacBook Pro M5: All the features and specs you need to know [LEAKS REVEALED]](https://tomsreviewbox.com/uploads/images/202502/image_430x256_67bd6d7cd7562.jpg)


How to Remove a Laptop Hard Drive: Quick & Easy in 2 Mins
Learn how to remove a hard drive from a laptop in just 2 minutes with our quick and easy guide. No hassle, no fuss!
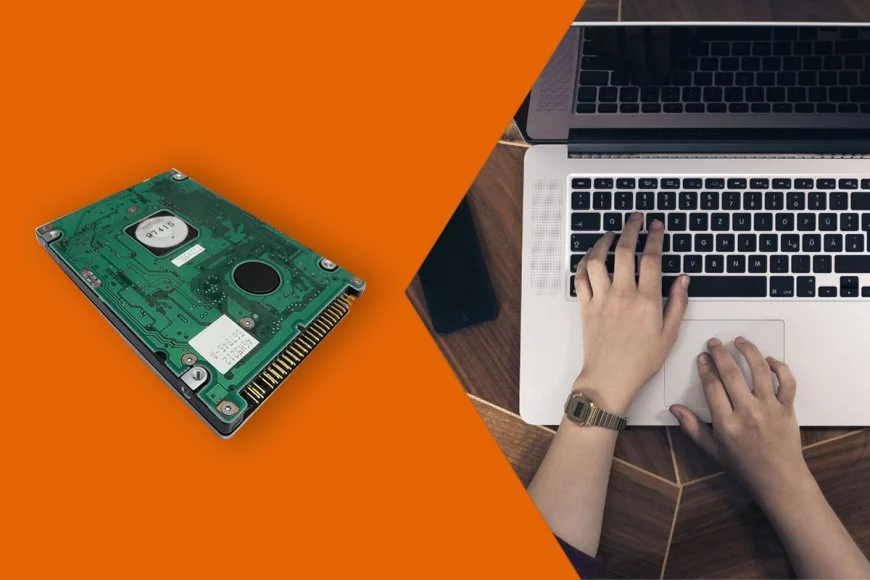
Looking to remove a hard drive from your laptop? You've come to the right place. In this guide, we'll walk you through the step-by-step process of safely removing a hard drive from your Windows laptop to prevent computer data loss. Whether you're planning on upgrading your computer's storage or need to recover data from a malfunctioning hard drive, understanding how to remove a laptop hard drive on a Windows machine is essential for managing the operating system.
Why is it important to safely remove the computer's hard drive before making any repairs or upgrades to avoid data loss? Whether you're getting a new laptop or upgrading your existing one, it's crucial to follow the correct procedure in order to protect your data. For Windows users, this means safely removing the hard drive before proceeding with any repairs or upgrades. Well, not only does it prevent accidental damage to the hard disk itself, but it also helps protect your valuable data from being corrupted or lost on a computer running Windows. By following our instructions, you'll be able to confidently remove the hard drive from your computer without causing any data loss or harm. This will allow you to transfer it to your new laptop or target disk seamlessly.
So, if you're ready to learn how to remove a hard drive from your laptop computer and take control of your storage needs, let's dive in and target disk!
Preparing for Removal
Before you dive into the process of removing a hard drive from your laptop computer, there are a few important steps you need to take to ensure a smooth and safe removal. Let's go through them one by one.
Gather Necessary Tools
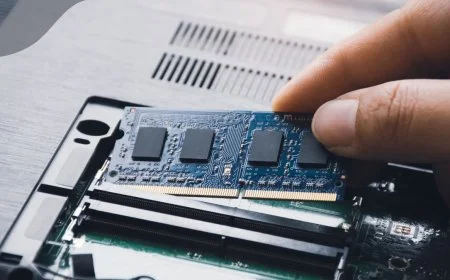
To start off, make sure you have all the necessary tools for your computer clone system at hand, including the keyboard. You'll typically need screwdrivers (including the type required for your laptop keyboard), an anti-static wristband, and perhaps some tweezers or pliers for delicate maneuvers on your hard disc. Additionally, ensure you have the necessary tools to clone your hard disc. Having the hard drive bracket and keyboard ready will save you time and frustration during the removal process of cloning the hard disc.
Create a Suitable Workspace
Next, find a suitable workspace where you can comfortably work on your laptop keyboard. Additionally, ensure that you have a clone of your hard disc as a backup in case of any data loss. It's best to choose an area with ample lighting so that you can clearly see what you're doing when you clone a hard disc using your keyboard. Also, make sure you have enough space to spread out your keyboard and keep track of any screws or small components that may need to be removed from your clone. Additionally, ensure you have enough space to store your red hard disc.
Follow Manufacturer Instructions
Before proceeding with the removal, it's crucial to check if your laptop's manufacturer has provided any specific instructions for safely removing the hard drive using the keyboard. Some laptops may require additional steps or precautions due to unique design features or proprietary hardware configurations. Following these instructions will help prevent any damage to your hard disc or voiding of warranties.
Backup Important Data
Before removing the hard drive, it's highly recommended to back up any important data stored on it. This ensures that even if something goes wrong during the hard disc removal process, your valuable files will remain safe and accessible. You can either transfer the data to an external storage device, such as a hard disc, or use cloud-based backup services.
Disconnecting Power Sources
To safely remove a hard drive from your laptop, it's crucial to disconnect all power sources beforehand. This ensures that there is no electrical current running through the hard disc, minimizing the risk of damage and potential hazards. Here are the steps you need to follow:
Shut Down Your Laptop Properly
Before removing the hard drive, make sure to shut down your laptop properly. This prevents any ongoing processes or data transfers on the hard disc that could lead to data corruption or loss. Simply click on the Start menu, select "Shut Down," and wait for your laptop's hard disc to completely power off.
Unplug the Power Cord
Once your laptop's hard disc is turned off, unplug the power cord from both ends – the wall outlet and your laptop's charging port. This step eliminates any connection between your laptop and an external power source. It's essential to ensure that there is no electricity flowing into the device before proceeding with the removal process.
Remove the Battery (If Applicable)
If you have a removable battery, take this opportunity to remove it as well. Many laptops nowadays come with built-in batteries that cannot be easily removed, so this step may not apply to everyone. However, if you do have a removable battery, locate the release latch or switch on its underside and slide it in the direction indicated to unlock it. Then gently lift out the battery from its compartment.
It's important to note that not all laptops have removable batteries; some have integrated ones that require professional assistance for removal.
Removing the Hard Drive Mount
To successfully remove a hard drive from a laptop, you'll need to locate and identify the hard drive mount within your laptop's casing. The hard drive mount is the component that holds the hard drive securely in place. Once you've located it, follow these steps to remove it:
Unscrew and Remove Any Screws Securing the Mount in Place
Check for any screws that are holding the hard drive mount in place. These screws may vary depending on your laptop model, so make sure to carefully examine the area around the mount. Use a screwdriver appropriate for the size of the screws and unscrew them counterclockwise.
Gently Slide Out the Mount from Its Slot
After removing all the screws securing the mount, gently slide out the mount from its slot. Take care not to force it or damage any surrounding components while doing this. Sometimes, mounts can be tight or have clips holding them in place, so use gentle pressure and wiggle it slightly if necessary.
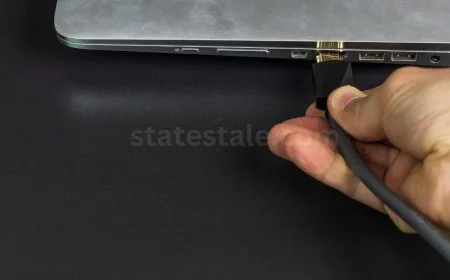
Disconnect Any Cables Connected to the Hard Drive
Before fully removing the mount, check if there are any cables connected to your hard drive. These cables might include power cables or data cables such as SATA connectors. Carefully disconnect these cables by gently pulling them away from their ports. Be cautious not to yank or pull too forcefully as this could damage both the cables and their respective ports.
Separating Hard Drive Connectors
To remove a hard drive from a laptop, you need to carefully disconnect all the cables connected to it. This includes the SATA or IDE connectors that link the hard drive to the motherboard. Here's how you can go about separating these connectors without causing any damage:
Identify and Disconnect Cables
Take a close look at your laptop's hard drive and locate the cables that are connected to it. These cables are responsible for transferring data between the hard drive and other components of your laptop. To remove them, gently unplug each cable from its respective connector.
Detach Adhesive Strips
Sometimes, there may be adhesive strips holding the cables in place. These strips ensure that the cables stay securely connected during regular use. However, they can make it tricky to remove the cables when needed. Carefully detach these adhesive strips by peeling them off without causing any harm to the cables or other components.
Keep Track of Connectors
As you disconnect each cable, it is essential to keep track of which connector it was attached to originally. This will make reassembly much easier later on when you're ready to install a new hard drive or reconnect the existing one. You can mark each cable with small labels or take pictures as a reference for later.
It's important to handle these connectors with care as they are delicate and can easily break if mishandled. Take your time and be patient while removing them.
Here are some additional tips:
-
Pro tip
Taking Out Strips for Easy Removal
To remove a hard drive from your laptop, you may need to deal with additional strips or brackets that could be blocking direct access. These strips can hinder the removal process, so it's important to clear them out first. Make sure to take note of their positions before removing them, as you'll need to reinstall them correctly later on. By eliminating these obstacles, you'll have an easier time removing and replacing your laptop's hard drive.
Remove any additional strips or brackets
Before attempting to remove the hard drive, check if there are any extra strips or brackets in your laptop that may be obstructing direct access. These can vary depending on the model and make of your device. They are usually located at the bottom or sides of the hard drive bay.
Take note of their positions
Once you've identified these additional strips or brackets, carefully observe and remember their positions. This step is crucial because it ensures that you can reinstall them correctly after completing other necessary steps. You don't want to end up with misplaced parts or face problems when putting everything back together.
Clearing these obstacles
By removing these additional strips or brackets, you're clearing the way for easy removal of your laptop's hard drive. It allows you to gain unobstructed access and simplifies the overall process. Think of it like clearing a path through a dense forest; once all the branches and vegetation are cleared away, walking becomes much easier.
FAQ: Laptop Hard Drive Location and Removal
Laptop Hard Drive Location
Wondering where to find the hard drive in your laptop? Well, it's usually tucked away beneath a panel on the bottom of your laptop. The exact location may vary depending on the make and model of your laptop, but it's typically located near the center or towards one side. Look for a small rectangular panel secured with screws.
Removing the Hard Drive
Removing a hard drive from a laptop isn't as daunting as it may seem. With a few simple steps, you'll have that old drive out in no time. Here's how:
-
Power Down: Before you begin, make sure to power down your laptop completely and unplug it from any power source. Safety first!
-
Remove Battery (if applicable): Some laptops have removable batteries that can get in the way of accessing the hard drive. If this is the case for your laptop, remove the battery before proceeding.
-
Locate and Remove Panel: Once you've powered down and removed any necessary components like batteries, locate the panel covering the hard drive on the bottom of your laptop. It should be easy to spot as it is often labeled or marked with an icon resembling a hard disk.
-
Unscrew Panel: Use a screwdriver to carefully unscrew all screws securing the panel in place. Keep these screws safe; you'll need them later when reinstalling the panel.
-
Slide Out Hard Drive
Removing the Battery for Access
To access and remove the hard drive from your laptop, you'll first need to remove the battery. This section will guide you through the process step-by-step.
Locate the battery compartment on your laptop
Begin by locating the battery compartment on your laptop. The exact location may vary depending on the make and model of your device. Usually, it can be found on the bottom of the laptop or along one of its sides.
Follow manufacturer's instructions for safe removal
It's crucial to follow the manufacturer's instructions when removing a laptop battery to ensure safety and prevent any damage. Different laptops may have different methods for removing their batteries, so it's essential to consult your device's user manual or visit the manufacturer's website for specific guidance.
Disconnect connectors or release latches securing the battery
Once you've located the battery compartment and consulted the instructions, it's time to disconnect any connectors or release latches that are securing the battery in place. These connectors or latches may vary depending on your laptop model.
-
Some laptops have connectors that need to be gently unplugged from their sockets.
-
Others might have latches that need to be slid or pressed in order to release them.
Be cautious while handling these components, as they can be delicate.
Carefully lift out the battery
With all connectors and latches released, carefully lift out the battery from its compartment. It's important not to rush this step and take care not to damage any surrounding components while doing so.
Quick Tips Before Hard Drive Removal
Before you dive into removing the hard drive from your laptop, there are a few important things to keep in mind. These quick tips will help ensure a smooth and successful process without any permanent data loss or damage to your device.
Back up Your Important Data
First and foremost, it's crucial to back up all your important data before removing the hard drive. This step is essential because once the hard drive is removed, you won't have access to your files anymore. By backing up your data, you'll have a copy stored elsewhere, safeguarding against any accidental deletion or mishaps during the removal process.
To back up your data, you can use external storage devices like external hard drives, USB flash drives, or cloud storage services. Simply copy and transfer all your important files to these backup sources. It's always better to be safe than sorry.
Take Precautions Against Static Electricity
Static electricity can pose a risk when handling sensitive computer components like hard drives. To protect both yourself and the device from static discharge, it's advisable to take precautions such as wearing an anti-static wristband or regularly touching a grounded object like a metal table leg.
Static electricity can build up on our bodies and transfer onto electronic components, potentially causing damage. So make sure you discharge any static buildup by grounding yourself before proceeding with removing the hard drive.
Refer to Your Laptop's User Manual
Every laptop model may have slight variations in their hardware design and disassembly process.
Unscrewing and Opening the Access Panel
To remove a hard drive from your laptop, you'll first need to unscrew and open the access panel. This section will guide you through the process step by step.
Identify and Remove Screws
Start by flipping your laptop over and locating the main access panel on the bottom. Look for any screws holding it in place. These screws are typically small and may require a Phillips head screwdriver to remove them.
-
Use a Phillips head screwdriver to unscrew the screws that secure the access panel.
-
Set aside the screws in a safe location so you can easily find them later when reassembling.
Gently Pry Open the Access Panel
Once you've removed all the screws, it's time to gently pry open the access panel. This can be done using a plastic opening tool or even your fingers. Be careful not to apply excessive force as you don't want to damage any components inside.
-
Insert a plastic opening tool or use your fingers to carefully pry open the access panel.
-
Work your way around the edges, applying gentle pressure until it begins to loosen.
-
If necessary, press down on any release buttons or tabs that may be securing the panel in place.
Mindful Handling of Components
As you remove the access panel, keep in mind that there may be delicate components connected to it. Take care not to tug or pull too forcefully, as this could cause damage.
-
Pay attention to any cables or connectors attached to the back of the access panel.
-
Disconnect these cables by gently pulling them away from their ports.
Bonus: Recovering Data from a Removed Hard Drive
Data Recovery: A Lifeline for Lost Files
Accidentally removing a hard drive from your laptop can be a nightmare, especially if you had important data stored on it. There's still hope to retrieve those precious files even after the hard drive has been removed. This bonus section will guide you through the process of recovering data from a removed hard drive.
The Importance of Data Recovery
Data recovery is like a superhero swooping in to save the day when all seems lost. It involves retrieving inaccessible or lost data from various storage devices, including hard drives. Whether it's due to accidental deletion, formatting errors, hardware failure, or even physical damage to the disk, data recovery experts possess the skills and tools necessary to bring back your valuable files.
Seeking Professional Help
Seeking professional assistance is often the best course of action. These experts have specialized knowledge and advanced techniques that increase the chances of successful data retrieval. They can work with both functional and physically damaged drives, utilizing specialized software and hardware tools to extract your files safely.
Pros and Cons of DIY Data Recovery
While professional help is recommended for complex cases or severe damage, some individuals may opt for a do-it-yourself (DIY) approach when attempting data recovery from a removed hard drive. Here are some pros and cons to consider:
Pros:
-
Cost-effective compared to professional services.
-
Allows you full control over the recovery process.
-
Can be done at your own pace without relying on external assistance.
Does Removing the Hard Drive Erase Data?
Data Safety Concerns
One common question that arises. The answer to this question depends on the specific circumstances surrounding the removal process.
Removing the Hard Drive
In most cases, simply removing the hard drive from a laptop will not automatically erase the data stored on it. The act of physically disconnecting or uninstalling the hard drive does not initiate any automatic data deletion processes. So, if you remove your laptop's hard drive and then reattach it later, you should still be able to access your files and data as usual.
Disposal and Recycling
However, it's important to note that if you plan on disposing of or recycling your old hard drive, there are additional steps you should take to ensure that your data is properly erased. This is especially crucial if you have sensitive or personal information stored on the drive that you want to protect.
To securely erase all data from a hard drive before disposal or recycling, consider using specialized software designed for this purpose. These programs overwrite all sectors of the disk with random data multiple times, making it extremely difficult (if not impossible) for anyone to recover any previous information.
Backup Your Data
Before removing a hard drive from your laptop for any reason, it's always wise to back up your important files and data.
Accessing the Hard Drive by Removing the Keyboard
To remove a hard drive from a laptop, you'll need to access it by removing the keyboard. Each laptop model may have specific instructions provided by its manufacturer for safely removing the keyboard. It's crucial to follow these instructions carefully to avoid damaging any components or voiding your warranty.
Once you've successfully removed the keyboard, you'll gain access to additional components, including hidden screws that secure the hard drive in place. These hidden screws can be easily missed if you're not familiar with the internal layout of your laptop.
When detaching ribbon cables connected to the keyboard, it's essential to exercise caution and keep track of their positions. These cables are delicate and can be easily damaged if mishandled. Taking a quick photo or making note of their arrangement before disconnecting them can help ensure they are reconnected correctly later on.
Follow Specific Instructions Provided by Your Laptop's Manufacturer
Different laptop models have varying designs and internal layouts, so it's crucial to consult your laptop's user manual or visit the manufacturer's website for specific instructions on removing the keyboard. These instructions will guide you through each step and highlight any precautions you should take.
Access Additional Components, Including Hidden Screws
Once you've successfully removed the keyboard according to your laptop manufacturer's instructions, take a moment to examine the exposed interior. You may notice additional components such as RAM modules or wireless cards that are now accessible.
Pay close attention to any hidden screws securing the hard drive in place. These screws might be concealed beneath other components or adhesive covers.
Disconnecting the Hard Drive from Connectors
To remove a hard drive from your laptop, you need to disconnect it from the connectors. This step is crucial in ensuring a safe and successful removal process. Here's what you need to do:
Identify and disconnect all cables connected directly to your laptop's hard drive, such as power and data cables.
Take a close look at your laptop's hard drive and locate the cables that are connected to it. These cables are responsible for providing power and transferring data to and from the hard drive. Carefully unplug each cable by gently pulling them away from the connectors.
-
Pro tip: It's always a good idea to consult your laptop's user manual or search online for specific instructions on how to identify and disconnect these cables for your particular laptop model.
Use caution when handling delicate connectors to avoid bending or breaking them during removal.
Connectors are small, delicate components that can be easily damaged if not handled with care. When disconnecting the cables from the hard drive, make sure to grasp them firmly but gently. Avoid applying excessive force or twisting motions that could potentially bend or break the connectors.
-
Pro tip: If you encounter any resistance while trying to detach a cable, double-check if there is a release latch or latch mechanism that needs to be disengaged before attempting again.
Keep track of each cable disconnected for easy reconnection later on.
It's essential to keep things organized during this process so that you don't end up confused when it comes time to reconnect everything.
Scanning and Choosing a Data Recovery Location
After successfully disconnecting the hard drive from the connectors, it's time to move on to the next crucial step: scanning and choosing a data recovery location. This step is essential because it determines where your secure data will be stored and how you can access it later.
Secure Data in the Right Place
You need to find a reliable place that ensures their safety. There are several options available for storing your recovered data:
-
External Hard Drive: Consider using an external hard drive as your data recovery location. It provides ample storage space and allows easy transfer of files between devices.
-
Cloud Storage: Another popular option is cloud storage services like Google Drive, Dropbox, or Microsoft OneDrive. These platforms offer secure online storage with easy accessibility from anywhere.
-
Network Attached Storage (NAS): If you have multiple devices connected to a network, using NAS can be an excellent choice for centralized data storage and access.
-
USB Flash Drive: For smaller amounts of data, USB flash drives are convenient and portable options.
Factors to Consider
When deciding on a data recovery location, there are some important factors you should consider:
-
Storage Capacity: Ensure that the chosen location has sufficient space to accommodate all your recovered files.
-
Accessibility: Consider how easily you can access your data from different devices or locations.
-
Security: Look for locations that offer encryption or password protection features to keep your sensitive information safe.
-
Reliability
Overview: Parts and Process of Laptop Hard Drive Removal
Disk Clone Process
Removing a hard drive from a laptop may seem like a daunting task, but with the right knowledge and tools, it can be accomplished easily. One important consideration before removing the hard drive is to back up your data. This ensures that you don't lose any important files during the process. One effective method for backing up your data is through disk cloning.
Disk cloning involves creating an exact copy of your hard drive onto another storage device. This allows you to have a backup of all your files and settings, ensuring that nothing is lost in case something goes wrong during the removal process. There are several software programs available that can assist you with disk cloning, such as Clonezilla or Macrium Reflect.
Once you have successfully created a clone of your hard drive, you can proceed with the removal process without worrying about losing any data.
The Removal Process
Now that you have backed up your data using the disk clone process, it's time to remove the hard drive from your laptop. Here's a step-by-step guide on how to do it:
-
Power off your laptop and unplug it from any power source.
-
Locate the access panel on the bottom of your laptop. This panel usually has small screws holding it in place.
-
Use a screwdriver to remove these screws and carefully lift off the access panel.
-
Identify the hard drive inside your laptop. It will be connected to the motherboard via cables or connectors.
-
Gently disconnect these cables or connectors from the hard drive by pulling them away.
-
Additional Screw Removal for Full Access
To fully remove the hard drive from your laptop, you may need to identify and remove any additional screws that secure it to its mounting bracket or enclosure. Different laptops may have varying screw placements, so it's essential to take note of their positions. Once all the screws are removed, you can gain full access to the hard drive and proceed with its removal.
There are a few key steps to follow:
Identify the Screws
Carefully examine the area around the hard drive for any visible screws. These screws may be securing the hard drive to a mounting bracket or directly onto the laptop's chassis. Take note of their positions as you will need this information during reassembly.
Gather the Necessary Tools
Before attempting to remove any screws, make sure you have a suitable screwdriver on hand. The type of screwdriver required will depend on the specific screws used in your laptop. It's always a good idea to use a screwdriver that fits snugly into each screw head to avoid stripping or damaging them.
Remove the Screws
Using your screwdriver, carefully unscrew each one that secures the hard drive in place. Ensure you apply steady pressure while turning counterclockwise until each screw is completely loosened and can be easily removed. Be cautious not to drop or lose any of these small screws as they are crucial for reassembling later.
Fully Access and Remove the Hard Drive
Once all additional screws have been successfully removed, you can now fully access and remove the hard drive from your laptop.
Bonus: Installing a New Hard Drive
Installing a new hard drive can be an exciting upgrade for your laptop. Whether you want to increase storage capacity or replace a faulty drive, this guide will walk you through the process step by step.
Preparing for Installation
Before diving into the installation process, there are a few things you need to consider and prepare:
-
Choose the right hard drive: Ensure that you select a compatible hard drive for your laptop. Check the specifications of your device or consult the manufacturer's website for guidance.
-
Back up your data: Before removing the old hard drive, it's crucial to back up all your important files and data. You can use an external storage device or cloud-based services for this purpose.
-
Gather necessary tools: To install the new hard drive, you'll need a screwdriver (typically Phillips-head) and possibly an anti-static wrist strap to protect against static electricity.
Step-by-Step Installation Guide
Now that you're prepared, let's dive into the steps involved in installing a new hard drive in your laptop:
-
Power down and disconnect: Shut down your laptop completely and unplug it from any power sources. This ensures safety during the installation process.
-
Locate and remove the old hard drive: Flip over your laptop and locate the compartment where the old hard drive is housed. It is usually located on the bottom of the laptop secured with screws or clips. Remove these screws or release the clips to access the old hard drive.
-
Disconnect cables and remove mounting bracket:
Safety Considerations When Removing a Hard Drive
Precautions against static electricity
Before you start removing the hard drive from your laptop, it's crucial to take precautions against static electricity. Static electricity can damage sensitive electronic components, so grounding yourself properly is essential. To do this, you can use an anti-static wrist strap or simply touch a grounded metal object before handling any internal components.
Avoid using excessive force
When removing parts from your laptop to access the hard drive, it's important to avoid using excessive force. Delicate connectors and other components can easily be damaged if too much pressure is applied. Take your time and gently disconnect cables and connectors. If something feels resistant, double-check for any locking mechanisms or screws that need to be removed first.
Follow manufacturer instructions and guidelines
To ensure a safe and successful removal process, it's crucial to follow the manufacturer's instructions and guidelines. Each laptop model may have specific steps or precautions you need to take when removing the hard drive. Consult the user manual or visit the manufacturer's website for detailed instructions tailored to your device.
Following these safety considerations will help protect both you and your laptop during the process of removing a hard drive.
Now that we've covered the safety aspects of removing a hard drive from a laptop let's move on to some practical tips:
-
Gather all necessary tools: Before starting, make sure you have all the tools required for safely removing the hard drive. This usually includes screwdrivers (both Phillips-head and flathead), an anti-static wrist strap (if available), and perhaps some tweezers or small pliers for delicate tasks.
Successful Laptop Hard Drive Removal
Congratulations! You have now completed all the necessary steps to successfully remove a hard drive from your laptop. By following the detailed sections in this blog post, you have gained the knowledge and confidence to perform this task with ease. Whether you're upgrading your hard drive, replacing a faulty one, or simply retrieving data from a removed drive, you are now equipped with the skills to tackle it.
Now that you've mastered the art of laptop hard drive removal, why not put your newfound expertise to use? Share this guide with friends or family who may benefit from it. Remember, practice makes perfect, so don't hesitate to try it out on another laptop if the opportunity arises. With each successful removal, you'll become even more proficient at handling various hardware components.
FAQs about Laptop Hard Drive Removal
Can I remove my laptop's hard drive without any technical knowledge?
Removing a laptop's hard drive requires some basic technical knowledge and caution. While this guide provides step-by-step instructions, it is important to proceed carefully and consult professional help if needed.
Is it possible to damage other components while removing the hard drive?
As long as you follow the instructions outlined in this guide and exercise caution throughout the process, there should be minimal risk of damaging other components. However, if you encounter any difficulties or uncertainties during the removal process, consider seeking assistance from a professional technician.
What tools do I need for removing a laptop's hard drive?
The tools required for removing a laptop's hard drive typically include screwdrivers (both Phillips and flathead), an antistatic wrist strap (recommended but not mandatory), and possibly tweezers or pliers for certain models. It is advisable to consult your laptop's user manual or online resources specific to your model for accurate information on required tools.
Can I reuse my old hard drive after removal?
Yes! If your old hard drive is still functional, you can repurpose it as an external storage device by using an external hard drive enclosure or adapter. This allows you to use the drive for backup purposes or transfer files between computers.
How often should I remove and clean my laptop's hard drive?
There is no specific timeframe for removing and cleaning a laptop's hard drive. However, if you notice performance issues, unusual noises, or your laptop becomes slow, it may be worth considering removing the hard drive for inspection and cleaning. Regularly backing up your data is also recommended to avoid any potential loss in case of a hardware failure.
Can I remove the hard drive from a laptop that is still under warranty?
What's Your Reaction?