How to Print Screen from MacBook Pro: Screenshot Basics & More
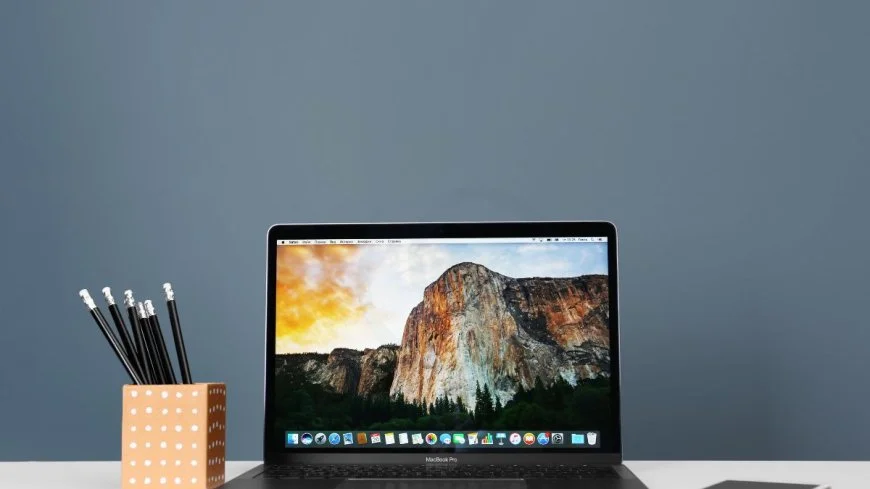
Want to capture your screen on a MacBook Pro? Printing screen on a MacBook Pro is a breeze compared to other devices. With just a few simple steps, you can effortlessly take screenshots, copy pictures, and share them with ease. No need for complex software or confusing settings - MacBooks make it simple.
Printing screen from a MacBook Pro offers convenience and efficiency, allowing you to capture important information or moments in an instant. Whether it's for work, school, or personal use, knowing how to print screen on your MacBook Pro can save you time and effort. Stay tuned as we guide you through the quick and easy process of capturing your screen on a MacBook Pro.
Key Takeaways
-
Learn the various methods to capture screenshots on a MacBook Pro, including full screen, portion of the screen, window or menu captures.
-
Utilize editing tools to enhance your screenshots by adding annotations, text, or highlighting important areas.
-
Stay organized by creating folders and naming conventions for easy access to your screenshots.
-
Share your screenshots effortlessly through email, messaging apps, or cloud storage services.
-
Implement advanced tips like using keyboard shortcuts for quicker screenshot captures.
-
Troubleshoot any issues encountered during the screenshot process to ensure smooth functionality.
Screenshot Basics
Overview
Taking screenshots on a MacBook Pro is essential for capturing important information or sharing visuals. Knowing different methods to take screenshots is crucial for various purposes. The built-in screenshot tools on Mac offer convenience and ease of use.
Shortcuts
Keyboard shortcuts play a significant role in efficiently taking screenshots on a MacBook Pro. Utilizing shortcuts can speed up the process of capturing screens. Primary keyboard shortcuts include Command + Shift + 3 for capturing the entire screen and Command + Shift + 4 for selecting a specific area. These shortcuts enhance productivity and make screen capturing more efficient.
Formats
Screenshots taken on a MacBook Pro are saved in various formats, with PNG being the default option. PNG format is preferred due to its high quality and lossless compression, making it ideal for detailed images. Other available formats include JPEG, PDF, and TIFF. Each format has its own advantages and compatibility with different applications, ensuring versatility in using captured screenshots.
Full Screen Capture
Keyboard Shortcut
To capture the whole screen on your MacBook Pro, simply press Command + Shift + 3. This keyboard shortcut is efficient and quick, ideal for instant full-screen captures. The simplicity of this method makes it a popular choice among users.
Preview Method
Another way to take a screenshot on your MacBook Pro is by using the Preview method. After pressing Command + Shift + 4 to print screen, drag the cursor to select the desired area for capturing. Once done, the preview thumbnail allows you to edit the screenshot easily. This method offers a visual approach to selecting and editing screenshots efficiently.
Portion of Screen
Selection Tool
The selection tool allows you to capture a specific portion of the screen with precision. Use the crosshair cursor to select the desired area accurately. This tool is ideal for capturing a specific part of the screen, such as the right corner.
When using the selection tool, simply click and drag the crosshair cursor to outline the area you want to capture. This feature provides flexibility for capturing only the necessary information on your MacBook Pro.
Drag & Capture
The drag and capture method offers a convenient way to take screenshots on your MacBook Pro. To use this feature, drag the selection box across the desired area on your screen. Once selected, capture the image by releasing the mouse button.
Window or Menu Capture
Specific Window
To capture a specific window on your MacBook Pro, press Command + Shift + 4, then hit the Spacebar. This combination changes the cursor to a camera icon, allowing you to select the desired window for a screenshot. Exclude window shadows by holding down the Option key while clicking.
Menu Screenshots
For capturing menus on your MacBook Pro, use Command + Shift + 4, followed by pressing the Shift key and then tapping the menu you want to capture. The camera icon pointer appears, enabling you to take a screenshot of the menu. This method provides quick and efficient menu captures with just a key press.
Editing Screenshots
Markup Tools
Markup tools on a MacBook Pro allow users to annotate and customize screenshots easily. These tools include options like text, shapes, arrows, and highlighting. Users can also adjust colors, sizes, and opacity for enhanced customization. The markup tools are intuitive and user-friendly, making it simple to add notes or emphasis to screenshots.
Utilizing markup tools provides several benefits when editing screenshots. Users can quickly draw attention to specific areas of the image by adding annotations or highlights. This feature is particularly useful for explaining concepts or providing feedback on visual content. The ability to customize screenshots with text and shapes allows for clearer communication in presentations or tutorials.
Cropping
Cropping is a valuable feature for adjusting the size and focus of screenshots on a MacBook Pro. By cropping an image, users can remove unwanted elements or excess background, ensuring that only relevant content is displayed. This feature is especially handy when capturing large screens or multiple windows simultaneously.
To crop a screenshot on a MacBook Pro, users can simply open the image in the Preview app, select the "Tools" menu, and choose the "Crop" option. Then, they can drag the corners of the selection box to crop the image as desired. Once satisfied with the selection, users can click "Done" to apply the changes. Cropping allows users to zoom in on important details within a screenshot while eliminating distractions from the periphery.
Organizing Screenshots
Default Location
On a MacBook Pro, screenshots are saved on the desktop by default. They appear as files with names like "Screenshot_date_time." Having screenshots directly on the desktop provides quick access.
When you capture a screenshot, it automatically appears on your desktop. The file is named according to the date and time of the capture. This naming convention helps in easily identifying when each screenshot was taken.
The convenience of having screenshots saved on the desktop is unparalleled. You can quickly locate and access them without navigating through multiple folders.
Changing Paths
To change the default location of saved screenshots on a MacBook Pro, you can customize the save path using the Screenshot app. First, open the Screenshot app and go to its preferences.
Within preferences, locate the "Options" menu where you can choose a different folder for saving your screenshots. By selecting a specific folder, you can organize your screenshots efficiently.
Customizing the save path offers flexibility in managing your screenshots effectively. You can categorize them into different folders based on projects or categories for easy retrieval later.
Sharing Screenshots
Via Email
Sharing screenshots via email from a MacBook Pro is straightforward. Simply compose a new email, click on the attachment icon, and select the desired png screenshot file. Attaching screenshots to emails for sending takes just a few clicks. The convenience of directly emailing screenshots to others ensures quick and efficient sharing.
Social Media
When it comes to social media, options for sharing screenshots are abundant. To upload screenshots to social media accounts, navigate to the platform, create a new post, and attach the png screenshot file. Sharing screenshots on social media platforms offers benefits such as increased engagement with followers and friends.
Advanced Tips
Terminal Commands
Terminal commands offer a quick and efficient way to take screenshots on a MacBook Pro. By using specific commands, users can capture screens without the need for additional software. The terminal provides advanced capabilities, such as capturing screenshots of specific windows or even timed screenshots.
For instance, by typing "screencapture -S filename.png" in the terminal, users can capture the screen and save it as a PNG file with a custom filename. Moreover, the terminal commands allow users to manipulate screenshot settings like image format, delay time, and screen capture location. This method is ideal for users who prefer text-based interfaces and want more control over their screenshot options.
Third-party Apps
Third-party apps offer enhanced features and functionalities for taking screenshots on a MacBook Pro. These apps provide additional tools like annotation options, cloud storage integration, and instant sharing capabilities. Popular third-party screenshot apps include Snagit, Lightshot, and Skitch.
One of the key advantages of third-party apps is their intuitive user interfaces that make capturing and editing screenshots seamless. For example, Snagit allows users to capture scrolling screens or create GIFs from screen recordings. These apps often come with built-in organizational features to help users manage their screenshots efficiently.
Troubleshooting
Common Issues
Users on a MacBook Pro may encounter screen freezing when attempting to take screenshots. Another issue is incorrect file format after capturing the screen. These problems can disrupt workflow and cause frustration. To resolve these issues, users should restart their device to unfreeze the screen. Changing the default file format for screenshots can help in rectifying the problem.
e users may face challenges with screenshot shortcuts not working, leading to inefficiency in capturing important information. In such cases, verifying the keyboard settings and ensuring that the shortcuts are correctly configured is essential. Moreover, updating the operating system can often fix this issue promptly.
Solutions
To overcome these hurdles, users can opt for alternative methods like using the Grab tool or third-party apps such as Lightshot for taking screenshots on a MacBook Pro. These tools offer diverse features and customization options that cater to different user preferences. Exploring these alternatives can significantly enhance the screenshot experience.
For resolving screen freezing problems, initiating a force restart by holding down specific keys can effectively unfreeze the device. This method helps in rebooting the system and addressing any underlying issues causing the screen freeze. Clearing up storage space on the device can prevent future occurrences of screen freezing during screenshot capture.
In cases where incorrect file formats persist, adjusting the settings in Preview can enable users to change the default format for saving screenshots. This simple tweak ensures that all captured screenshots are saved in preferred file formats without any conversion hassle. Users can also utilize online tools for quick conversion if needed.
Closing Thoughts
You've now mastered the art of capturing, editing, and sharing screenshots on your MacBook Pro. Remember these tips for quick and efficient screen grabs. Organize your screenshots for easy access and share them effortlessly with friends or colleagues. If you encounter any issues, refer to the troubleshooting section for solutions. Now go ahead and put your newfound skills to use!
Capture your screen like a pro, edit with finesse, and share your creations confidently. Enhance your productivity and communication by leveraging these screenshot techniques. Keep practicing to become a screenshot guru in no time!
Frequently Asked Questions
How do I take a screenshot on a MacBook Pro?
To take a screenshot on your MacBook Pro, press Shift + Command + 3 to capture the entire screen. The screenshot will be saved on your desktop.
Can I capture a specific portion of the screen on my MacBook Pro?
Yes, you can capture a specific portion of the screen by pressing Shift + Command + 4 and then selecting the area you want to capture.
Is it possible to capture a window or menu on my MacBook Pro?
Absolutely! To capture a specific window or menu, press Shift + Command + 4, then press the Spacebar. Click on the window/menu you want to capture.
How can I edit screenshots on my MacBook Pro?
You can edit screenshots using the built-in Preview app. Open the screenshot in Preview, click on the "Markup" icon, and use tools like shapes, text, and colors to edit.
What are some advanced tips for taking screenshots on a MacBook Pro?
For advanced users, try using third-party apps like Snagit for more editing options. You can also explore keyboard shortcuts for specific editing functions within these apps.
What's Your Reaction?





















![MacBook Pro M5: All the features and specs you need to know [LEAKS REVEALED]](https://tomsreviewbox.com/uploads/images/202502/image_430x256_67bd6d7cd7562.jpg)
