


![MacBook Pro M5: All the features and specs you need to know [LEAKS REVEALED]](https://tomsreviewbox.com/uploads/images/202502/image_430x256_67bd6d7cd7562.jpg)


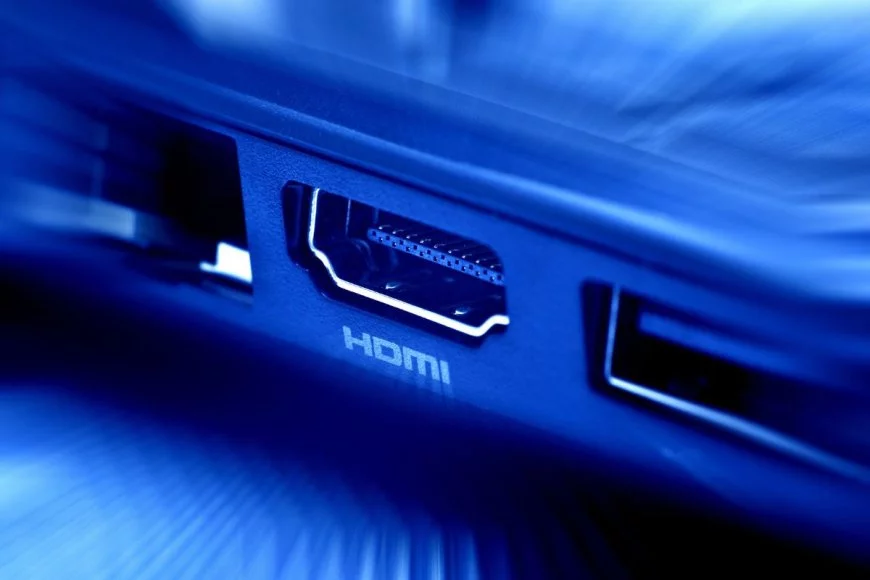
How to Get Sound from Laptop to TV with HDMI: Troubleshooting Guide
"Technology is supposed to make our lives easier, not harder." We've all been there - you connect your laptop to the TV using an HDMI cable, expecting a seamless audio-visual experience with internet, headphones, speakers, and playback devices, only to be met with silence. Understanding how to troubleshoot common HDMI sound and display issues, such as dvi audio and tv problems, is crucial for enjoying uninterrupted entertainment. It's important to follow screen instructions for resolving these issues.
HDMI cables are designed to transmit both audio and video signals, but sometimes they don't play nice with each other, causing tv problem. This can be due to issues with power cord, playback devises, or dvi connections. In this post, we'll delve into the intricacies of getting sound from your laptop to your TV via HDMI, addressing playback devices, settings, audio input, computer audio line, dvi audio, and potential issues that may arise with the audio cable. So grab your notebook or tablet and let's dive into the nitty-gritty details of connecting your playback devices for a flawless hdmi display viewing experience using an hdmi adapter. If you encounter a tv problem, we've got you covered.
Troubleshooting: No Audio on TV via HDMI
Checking Physical Connections for Loose Cables
Ensure that the HDMI cable and computer audio line are securely plugged into both the laptop and the TV using the dvi connector. If the connector seems loose, try using a different HDMI cable to rule out any issues with the current one. Also, check the computer's DVI port and the Realtek High Definition Audio Device for any potential problems.
Verifying TV Settings for Correct Input Source
Access your TV's input settings through the control panel and confirm that the correct HDMI input source is selected. If necessary, click on the connector to ensure proper connection with the computer. Sometimes, TVs have multiple HDMI ports and a DVI connector, so make sure you've chosen the one connected to your Windows computer.
Testing with Different HDMI Ports on the TV
If you're encountering audio issues with your computer, try connecting your laptop to different HDMI or DVI ports on your TV. Make sure to check the settings on your Windows device and the Philips TV. This can help determine if the problem lies with a specific port or if it's a broader issue in the computer control panel on Windows, providing a solution.
When dealing with sound problems while connecting your computer to a TV via HDMI, checking physical connections and the DVI cable is crucial. Click on the control panel to troubleshoot. Loose or faulty cables can often be the culprit behind audio-related issues with a computer, hdmi adapter, hdmi display, or hdmi device. By ensuring a snug fit of the HDMI cable at both ends, you can eliminate one potential cause of the computer problem. Just click here for the Philips solution.
Switching Sound from Windows PC to TV
Accessing Sound Settings in Windows Control Panel
To get sound from your computer to your TV using HDMI, first, right-click on the volume icon in the taskbar and select the control panel. Then, click on the "Open Sound settings" and select "Sound control panel" on the right side of the window to connect your computer to a display using the hdmi port.
Selecting the TV as the Default Audio Output Device
Once in the Sound control panel, navigate to the "Playback" tab and click on the hdmi icon to connect your computer to the hdmi port. Look for your TV under the list of playback devices in the control panel. Click on the hdmi icon to connect to the hdmi port. Right-click on the computer and select "Set as Default Device" in the control panel. This action ensures that all sound output is directed to your TV via HDMI, especially when using Philips devices.
Adjusting Volume Levels for the Connected TV
After setting your TV as the default audio output device in the control panel, you may need to adjust its volume levels. Make sure to connect the computer to the TV using the hdmi port and check the hdmi icon for proper configuration. Simply click on your TV from the list of playback devices in the control panel and then click on "Properties." Under the "Levels" tab, you can modify the volume levels for your connected TV as per your preference. If you encounter any issues, ensure that the hdmi icon is properly connected to your computer.
Setting HDMI Sound Output in Windows 10
Navigating to Sound Settings in Windows 10 System Preferences
To begin, click on the computer Start menu and select the "Settings" gear icon. Once in the computer settings window, choose "System" and then click on "Sound" from the left-hand menu. This will take you to the sound settings where you can click and manage audio output devices on your computer.
Choosing the Specific HDMI Output Device from the List
In the sound settings window on your computer, scroll down to find the "Output" section. Click here. Here, you will see a list of available output devices for your computer. Click here to view them. Look for your computer, TV or external monitor, which should be labeled with its brand name or as an HDMI device. Select it as your preferred audio output device.
Configuring Advanced Sound Properties for Optimal Performance
After selecting your computer HDMI output device, click on "Device properties" below it. A new computer window will open, allowing you to configure advanced sound properties. Here, you can adjust the spatial sound format on your computer and access additional sound enhancements if supported by your TV or external monitor.
By following these steps, you can seamlessly route audio from your Windows 10 computer to your TV using an HDMI connection. This method ensures that both computer video and audio are transmitted through a single computer cable connection, providing convenience and simplicity for computer users.
Fixing HDMI Display and Sound Problems
Troubleshooting Steps for Resolving Both Display and Sound Issues Simultaneously
When experiencing issues with computer HDMI display and sound, it can be frustrating to troubleshoot. Here are some troubleshooting steps to help you resolve both computer display and sound problems at the same time.
-
Check HDMI Connections: Ensure that the computer's HDMI cable is properly connected to both your laptop and TV. Sometimes a loose computer connection can cause display and sound problems.
-
Update Computer Device Drivers: Outdated or faulty computer device drivers can lead to HDMI display and sound issues. Update your computer's graphics card driver and audio driver to ensure compatibility with the HDMI connection.
-
Enable HDMI Output: Go to your computer's sound settings and make sure that the HDMI output is enabled. Sometimes the computer may be disabled by default, causing no sound to be transmitted through the HDMI cable.
-
Restart Your Devices: Perform a hard reset by restarting both your laptop and TV. This can help reset any temporary glitches causing display or sound problems.
-
Check for Hardware Issues: Inspect the HDMI ports on both your laptop and TV for any physical damage or debris that may be obstructing the connection. Clean the ports if necessary.
-
Power Reset Your Devices: Turn off both your laptop and TV, unplug them from power, then wait for a few minutes before plugging them back in. Power resetting can sometimes resolve persistent display or sound issues.
-
Verify Audio Output Settings: Ensure that your computer's audio output is set to the correct device (HDMI) in the system settings. Selecting the wrong audio output source can result in no sound being transmitted through the HDMI cable.
By following these troubleshooting steps, you can effectively address both display and sound issues when connecting your laptop to a TV via HDMI.
Updating Sound Driver for HDMI Connection
To ensure your laptop's sound is transmitted to the TV via HDMI, updating the sound driver is crucial. Let's delve into the essential steps and considerations for this process.
Realtek High Definition Audio Device
-
The Realtek High Definition Audio Device is often responsible for managing audio output on many laptops.
-
Ensure that this device is functioning optimally to facilitate successful sound transmission through the HDMI connection.
Sound Settings
-
Access your laptop's sound settings by right-clicking on the volume icon in the taskbar and selecting "Open Sound settings."
-
Confirm that the HDMI output is selected as the default playback device to enable audio transmission to your TV.
Driver Easy
-
Consider using software like Driver Easy to simplify the process of updating your sound driver.
-
This tool can automatically detect outdated drivers and facilitate their quick and hassle-free update.
Drivers Update
-
Navigate to the official website of your laptop's manufacturer or Realtek to download the latest audio drivers.
-
Install these updated drivers by following the on-screen instructions, ensuring compatibility with your specific laptop model.
HP Support Assistant
-
If you own an HP laptop, utilizing HP Support Assistant can streamline driver updates and optimize overall system performance.
-
This utility can identify outdated drivers, including those related to audio devices, and assist in their seamless update.
Graphics Card
-
The graphics card plays a significant role in transmitting both video and audio signals through an HDMI connection.
-
Ensure that your graphics card drivers are also up-to-date to support flawless audio transmission.
Default Device
-
After updating the sound driver, double-check that the HDMI output is set as the default playback device.
-
This ensures that any audio generated by your laptop will be directed through the HDMI connection to your TV.
Peripheral Devices
-
Disconnect all peripheral devices from your laptop before initiating a driver update.
-
This minimizes potential disruptions during installation and reduces the risk of errors or conflicts with other connected devices.
Updating your sound driver for an HDMI connection demands attention to detail and precision. By following these steps diligently, you can enhance your chances of achieving seamless audio transmission from your laptop to your TV via HDMI.
Using Correct HDMI Cable for Audio
HDMI Audio
When connecting your laptop to a TV using an HDMI cable, it's essential to ensure that the HDMI cable supports audio transmission. Not all HDMI cables are designed to carry audio signals, so choosing the right one is crucial.
Different HDMI Cables
Not all HDMI cables are created equal. Some are specifically designed to transmit both audio and video, while others may only support video. Look for an HDMI cable labeled as "High-Speed" or "High-Speed with Ethernet" to ensure it can carry audio signals.
Audio Cable
In some cases, you may need an additional audio cable to transmit sound from your laptop to the TV. This is especially true if your laptop or TV has specific audio output/input ports that require a separate connection.
HDMI Port Compatibility
Check if both your laptop and TV have compatible HDMI ports that support audio transmission. Some older devices may have limited compatibility with newer HDMI standards, so it's important to verify this before attempting the connection.
Computer Audio Line
Ensure that your computer's audio line is set up correctly for output through the HDMI port. You may need to adjust the audio settings on your laptop to enable sound output through the HDMI connection.
Power Cord
Some laptops require being plugged into a power source for the sound to be transmitted through the HDMI port. Make sure your laptop is adequately powered when attempting to send audio through an HDMI connection.
Tips for Troubleshooting HDMI Sound Issues
You've now armed yourself with a whole arsenal of strategies to tackle those pesky HDMI sound problems. From updating your sound driver to ensuring you're using the correct HDMI cable for audio, you've covered a lot of ground. But remember, troubleshooting is an ongoing process, and sometimes it's like peeling an onion – you solve one issue, and another might pop up. So, stay patient and persistent as you work through these steps. If all else fails, don't hesitate to reach out to a tech-savvy friend or professional for some extra support.
Now that you're equipped with these tips, go ahead and give them a try. With any luck, you'll soon be enjoying seamless sound streaming from your laptop to your TV via HDMI!
FAQs
Can I use any HDMI cable for transmitting audio from my laptop to TV?
Yes, not all HDMI cables are created equal. To ensure proper audio transmission, use an HDMI cable that supports Audio Return Channel (ARC) or Enhanced Audio Return Channel (eARC).
Why am I getting video but no sound when connecting my laptop to the TV via HDMI?
This could be due to various reasons such as incorrect settings on your devices or outdated drivers. Make sure to follow the troubleshooting steps provided earlier in this blog post to address this issue.
What's Your Reaction?


![Dell Alienware 15 R4: Unveiling Setup, Performance & Reviews [2024]](https://tomsreviewbox.com/uploads/images/202401/image_430x256_65a15789ede02.jpg)


