How to Format Your Header in Microsoft Word?
Learn how to put a header on Microsoft Word with easy step-by-step instructions and tips for custom formatting.
Key Takeaways
- Adding headers to your document gives it a more polished and formal appearance. They provide a natural border for titles, author names, and logos. Adding headers to your document can really improve the overall look and feel as well as the readability.
- To insert a header, begin by clicking the “Insert” tab. Next, select the type of header you want and edit it using text or images. This is important to remember when saving changes so the header will show up on every page correctly.
- Microsoft Word makes it simple to swap out fonts and add in images, allowing you to customize and professionalize your document. Play around with alignment tools to give your document a professional appearance.
- Check the box for “Different First Page” to create a special header for your first page. This nifty feature is ideal for easily adding title pages or cover sheets. This customization is possible through special coding that spares any changes to the subsequent pages.
- Good headers are uniform in style and content on every page. Templates provide a polished, professional appearance, and less is more — keep it simple and include only what the reader needs to know.
- Fonts that are easy to read help your resume look more polished and professional. Select easy-to-read fonts, utilize clear contrasting colors, and steer clear of distracting decorative designs to keep the reader's attention where it matters most—on your document's content.
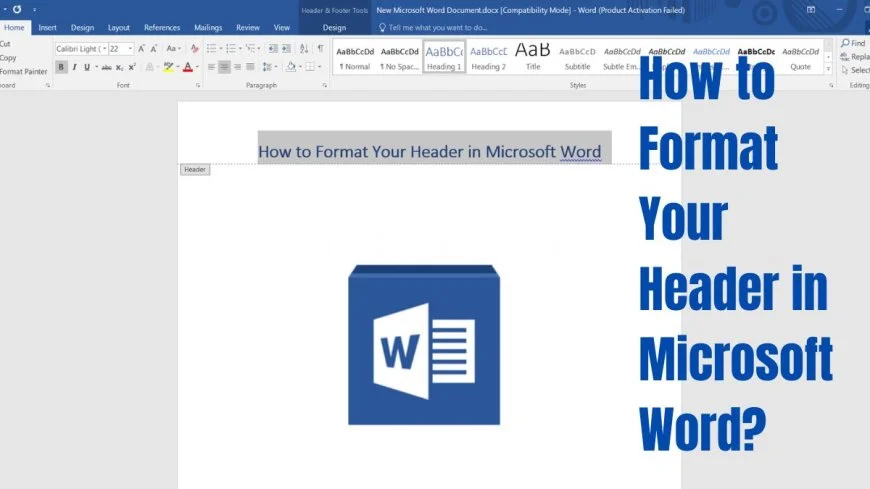
Learning how to add a header in Microsoft Word can help you make your document look more polished and structured. Headers in Word are easy to insert, modify, and delete, providing a range of styles and formats to suit your preferences.
You start off by going to the “Insert” tab, where the header option is super easy to find. Select one of our pre-designed headers or make your own! In this manner, you can easily add essential information such as titles, dates, and page numbers.
This feature allows each page of your document to have a professional, uniform look. Learn how to put a header on Microsoft Word and make your research paper, business report, or whatever it is you are writing look professional.
It will save you time and make your work more professional looking!
What is a Header in Word
A header in Word is any text or picture you place at the top of every page. This will add context and structure to your document. However, there is much more to it than simply being a decorative element.
Headers aren’t just for aesthetics or structure. Headers have a functional purpose, providing helpful context to readers. It could be anything from the title of the document, the name of the author, to the date. This makes it easier to quickly locate the document you’re looking for.
In more formal documents, headers can be a more nuanced tool. They are the perfect place to put page numbers or company logos, tying all the pages of the document together in a professional and cohesive manner.
The header is an important part of the design of your document. It improves the overall aesthetics and draws attention to important content. A business proposal begins with a big, bold header that grabs attention. It should show off the company’s design aesthetic, the date and a catchy project title.
Once you add something as a header in Word, that text or picture will be on every page. Using the “Different First Page” option located in the Header settings, you can create a unique header for your first page.
This will make it visually distinct from the header on the following pages. This is especially handy for documents with multiple pages such as reports, where the front cover page may need a different format.
You can change headers to show up only starting on the second page. Headers can be further customized by including different elements. Use varied text, image, and presentation styles—such as font, color, and size—to emphasize key concepts.
Steps to Add a Header
Adding a header in Microsoft Word is simple! With this new feature, you can insert custom headers or images to the top of your pages, enhancing your page layout. Here’s a how-to guide to follow step-by-step.
1. Open the Header Menu
- Start by opening your document in Microsoft Word.
- Click on the “Insert” tab located in the top toolbar to bring up the header options.
- From this page, find the "Header" button and select it. This action will open up a dropdown menu with several different header styles to choose from.
- Take time to learn about these opportunities. Whether you use modern or blue, each style provides distinct design elements that perfectly align with your document’s overall theme.
- As you can see, this header menu is your portal to building and designing your new header.
2. Choose a Header Style
- Experiment with the header styles from the dropdown menu. Think about which of these styles best serves your document’s purpose.
- Being able to preview these styles before you select them allows you to make a better informed decision. The proper style can go a long way toward making your document look more professional.
3. Insert Desired Text
- Once you select the style, click into the header area and start customizing.
- Provide clear identifying information such as the title of the document, name of the author, and date. You may modify this text in output.render() if you wish.
4. Customize Header Content
- To access additional formatting options, use the Header & Footer Design tab.
- Consider adding images or logos for personalization.
- Make sure the font style, size, and color are such that it’s easy to read, keeping the design clean and professional.
5. Save Changes
- Click the "Close Header and Footer" button to save your changes.
- To ensure a uniform appearance, view the header print preview. Don’t worry, you can always go back to change the header by double-clicking on it.
Explore Header Formatting Options
When designing things in Microsoft Word, particularly Word 2013, the options for producing polished, professional documents are endless. First, to start, the Header & Footer Design tab offers a whole range of options to alter the look of your document’s header, including custom headers and unique header styles.
- Selecting a font that complements your document's tone is essential. A typical formal report looks great with a very formal font such as Times New Roman. In contrast, in a creative piece, you can get away with something much fresher and more contemporary.
- You can use size and color to emphasize the most important information. Using bigger fonts can help emphasize the most important information, and bold or bright colors can help your header pop.
- Adding a personal touch with images or logos can significantly impact the document's professionalism. Click “Pictures” in the Header & Footer Design tab to insert images with a high resolution.
- These visuals will help make your document a more impactful and aesthetically pleasing advocacy tool. Just remember when you’re resizing them to make sure they’re complementing and not distracting from the text. Logos are particularly useful for maintaining brand identity across various business documents.
- Proper text alignment within the header contributes to a polished look. Alignment to left, center, or right will help you get the perfect layout.
- Previewing the layout in print preview will help you make sure everything looks good when you actually print it on normal 8.5 by 11-inch letter-sized paper.
Change Font and Size
Click on the header text to adjust the font and size, ensuring the font is readable and consistent throughout your document. Using larger fonts to emphasize critical information works well in creating a great design.
Add Images or Logos
Insert images to personalize your letter by clicking the 'Pictures' button to insert images. Use logo images when appropriate to reinforce brand identity, ensuring they fit well within the page layout tab.
Align Text Properly
Alignment tools allow for even spacing and alignment of text, ensuring a polished look. Quality tip: Check your alignment in print preview under the page layout tab to confirm it appears as intended.
Using Different First Page Header
When you upload a Microsoft Word document, use a different header on the first page. This simple adjustment can make a big difference in your document’s overall look. This is particularly handy for a title page or cover sheet.
It’s pretty simple to remove things from the first page that show up on every other page. By enabling the "Different First Page" option in the Header & Footer Design tab, you can customize your document to suit these needs.
Enable Unique First Page Option
To set a special header for your first page, start by accessing the header & footer design tab. Next, just tick the box for “Different First Page.” Selecting this action allows you to create a separate header for the first page without affecting headers on later pages.
Consider what details are the most important to include on your first page. Maybe it just has your name on it, the title of the document, or a logo. Don’t forget, once you enable this feature, you need to save your changes for the setting to take effect.
Customize First Page Header
Now that you’ve set the unique option, it’s time to add some custom text or images to your first page header. This is your chance to get creative, but don’t go overboard.
Clear it up and be engaging while being clear to draw readers in without overwhelming them. To add a page number, begin by clicking your cursor where you want the page number to go.
Next, head to the Insert tab and choose Page Number, then Current Position and Plain Number. If you find that you need to make changes, you can always go back and change the first page header.
Tips for Effective Headers
Making proper headers in Microsoft Word is key to a nicely structured document. Here are some tips:
- Maintain consistency in style and content across all pages.
- If you are not confident on design choices, use templates to ensure you have a professional aesthetic.
- Keep headers simple by including only essential information.
Enhance Document Organization
Headers help with content hierarchy by breaking up text with informative headers, improving user experience. Clear, descriptive headers help readers follow along, so they are clear on what information is being presented and in what order.
Strategically placing headers improves readability and assists users in finding important sections of your page quickly. Adding section-specific headers and footers goes a long way to help with organization and readability, which can be especially helpful in long documents.
Improve Readability with Clear Fonts
Selecting appropriate fonts is key to legibility. Choose fonts that are easy to read and appropriate for your audience, and use contrasting colors for text and background to make your content stand out.
Don’t use fancy decorative typefaces that make it hard for the reader to focus on what you are saying. Well-chosen, legible fonts help instill a sense of professionalism, further enhancing the document’s overall readability and aesthetic.
Use Consistent Styles Across Pages
Having a consistent header style throughout the document is important for a professional appearance. Consistency is key.
Header font, size and color should remain the same throughout the entire document. Proof each page to make sure headers are consistent with the style you’ve set, creating a sense of flow.
Commanding headers and footers enhance both usability and aesthetics, helping your document look polished and professional.
Using headers and footers wisely in Microsoft Word enhances a document’s organization, readability, and professionalism. The Page Layout tab provides further customization using styles for each section, which is important when creating long documents.
Getting comfortable with these features makes your presentation more visually engaging and user-friendly, since 90% of information transmitted to the brain is visual.
Conclusion
In just a few simple steps, learn how to insert a header in Microsoft Word. Follow these steps and you’ll be on your way to a great looking, professional header. Explore the formatting tools to bring your own flair and energy to your projects and help your work jump off the page. If you need a different first-page header, you can configure that, too. Keep your headers focused on the big picture, not on the details. That way, your documents are sure to always look professional and prepared to wow the competition. Now we want to hear from you and have you test it out. Get back into Word, insert those headers, and discover how they can make your documents more effective. The power to take your work to the next level is literally at your fingertips. Get creative and find out where that creativity leads you!
Frequently Asked Questions
What is a header in Microsoft Word?
A header in Microsoft Word is the area at the very top of each page, which can include text, an image, or a page number. By adding custom headers, you can incorporate details like the document title or author name.
How do I add a header in Word?
To insert a header, click on the 'Insert' tab and then select 'Header' to choose a style. You can then insert your text or add other items, such as pictures, to create a perfect header.
Can I format headers differently on the first page?
Next, head to the Design on the Header & Footer Tools tab. If you want to create a unique header for your first page, then check the box for Different First Page.
What formatting options are available for headers?
Headers can be personalized with specific font styles, sizes, colors, and alignments, while incorporating elements like corporate logos or page numbers to enhance your document's polished appearance and overall page layout.
Why should I use headers in my document?
Inserting headers in your document not only lends a polished look but also enhances page layout, helping readers orient themselves and improving usability and readability, while keeping critical information visible at all times.
How can I make my headers more effective?
Keep headers uncluttered and to the point by using the page layout tab to adjust margins. Ensure the text is short and easy to read with clean fonts, including only the essential details like the title of the document or chapter names.
Are there any tips for creating headers in Word?
Apply built-in header gallery designs for uniformity in your Word documents. If you include a lot of content, adjust header margins to avoid a cluttered appearance. Make it a routine practice to check and refresh headers for accuracy and currency.
What's Your Reaction?






![MacBook Pro M5: All the features and specs you need to know [LEAKS REVEALED]](https://tomsreviewbox.com/uploads/images/202502/image_430x256_67bd6d7cd7562.jpg)

