![MacBook Pro M5: All the features and specs you need to know [LEAKS REVEALED]](https://tomsreviewbox.com/uploads/images/202502/image_430x256_67bd6d7cd7562.jpg)


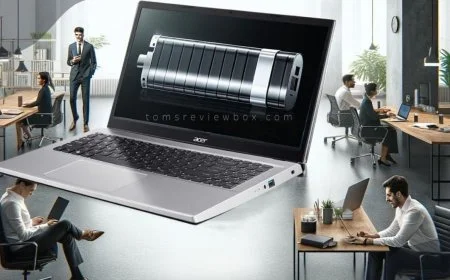
How to Connect Acer Laptop to TV with HDMI Cable or Wirelessly
Learn the step-by-step process of connecting your Acer laptop to your TV with an HDMI cable. Easy and hassle-free instructions for a seamless experience.
Want to enjoy your favorite shows or games on a larger smart tvs or capable tv with sized hdmi output? Connecting your Acer laptop to your smart TV with an HDMI cable through the external video port is the way to go for an external display or desktop screen. This simple process lets you mirror your laptop's desktop screen to a big screen TV, making it easy to share content with friends and family using a mini HDMI.
In just a few steps, you'll be able to set up your devices, including your big screen TV and desktop screen, and enhance your viewing experience on the TV screen or external display. Whether you're streaming movies on a screen tv or giving a presentation on an external display, using an HDMI connector ensures high-quality audio and video. Forget about complicated setups; this method is straightforward and efficient for connecting to a tv screen via an external video port. Get ready to transform your entertainment setup with an external video port in no time!
Why Use HDMI
Benefits of HDMI
HDMI offers high-definition audio and video quality. This means you can enjoy your favorite movies or games in stunning detail through the external video port. A single cable connection simplifies the setup process. You don’t have to deal with multiple cables, which reduces clutter around your devices with the external video port.
Most modern TVs and laptops support HDMI. This makes it a versatile choice for connecting various devices, including an external video port. Whether using a laptop with an external video port, gaming console, or home theater system, HDMI works seamlessly. It provides a straightforward solution with a video port for all your entertainment needs.
HDMI vs Other Connections
HDMI stands out as a video port when compared to older connections like VGA or RCA. These older options do not match HDMI's superior audio and video quality. VGA only transmits video signals, while RCA separates audio and video into different cables.
HDMI also transmits both audio and video signals simultaneously. This is a significant advantage over many alternatives that require separate connections, such as a video port. For example, using an RCA video port connection means dealing with extra cables and potential confusion.
Ease of use is another strong point for HDMI. Most devices connect directly without needing additional adapters. This feature saves time and effort when setting up your devices with the video port.
Common Uses for HDMI
HDMI is commonly used for connecting laptops to TVs. This setup with a video port allows you to stream movies or share presentations easily. The high-quality picture enhances viewing experiences significantly.
Gaming consoles also benefit from HDMI connections. Players enjoy an enhanced gaming experience with crisp graphics and clear sound. This connection type supports high frame rates, making gameplay smoother.
Home theater systems utilize HDMI for immersive sound and picture quality. Connecting various components through HDMI ensures a cohesive entertainment experience. You can enjoy movies just like in a cinema right from your living room.
Preparing Your Devices
Check Your Ports
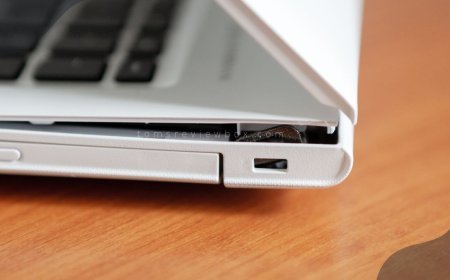
Identify the type of HDMI port on your laptop. Most Acer laptops have a standard HDMI output. However, some newer models may feature USB-C ports instead. Inspect your TV’s available HDMI inputs. Most TVs come with multiple HDMI slots. Choose the one that is easiest to access.
Verify any additional ports on your laptop. If it lacks a standard HDMI output, you may need an adapter. An adapter can convert USB-C to HDMI or DisplayPort to HDMI. Knowing these details helps ensure compatibility between devices.
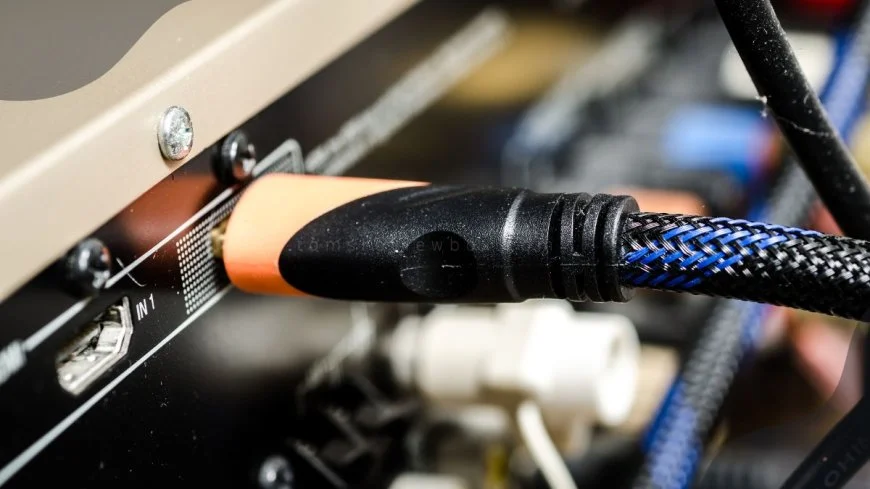
Get the Right Cable
Choose the proper HDMI cable for your connection. Standard cables work for most setups, but check if your devices require specific types. For example, high-speed cables support 4K resolution and higher refresh rates.
Consider the cable's length based on your setup needs. Measure the distance from your laptop to your TV. Ensure you have enough slack without compromising quality. Avoid overly long cables, as they can affect signal strength.
Look for cables that support your required resolution and refresh rates. Some cables are designed for specific tech needs, such as gaming or streaming. Selecting the right cable ensures a smooth viewing experience.
Update Drivers
Ensure your laptop's graphics drivers are current. Outdated drivers can lead to connectivity issues when using HDMI. Visit the Acer website or use device management tools to find updates.
Check for system updates regularly. These updates may enhance HDMI functionality and overall performance. Keeping your operating system updated is vital for smooth operation.
Restart your laptop after updating drivers. This step applies any changes made during the update process. It also clears temporary glitches that might interfere with the connection.
Connecting Acer Laptop to TV
Plug in the HDMI Cable
Start by taking your HDMI cable. Connect one end of the HDMI cable to the laptop's HDMI output securely. This port is usually located on the side or back of the Acer laptop. Next, insert the other end into the TV's HDMI input, ensuring a snug fit. Most TVs have multiple HDMI ports, so pick any available one.
Before making these connections, confirm that both devices are powered off. This step helps prevent damage during setup. Once everything is connected, power on both the laptop and the TV.
Switch to HDMI Input
Grab your TV's remote control next. You need to select the correct HDMI input source for your TV. Press the "Input" or "Source" button on the remote. A list of options will appear on the screen.
Navigate through this menu to find the HDMI input you used earlier. If you plugged into HDMI 1, choose that option. It’s important to ensure that the selected input matches the HDMI port used for connection. Failing to do so will keep you from seeing your laptop screen on the TV.
Adjust Display Settings
Now it’s time to adjust display settings on your Acer laptop. Right-click on the desktop and select "Display settings." This action opens up a new window where you can configure how your screen appears.
You’ll notice options like "Duplicate," "Extend," or "Second Screen Only." Choose "Duplicate" if you want both screens to show the same content. Select "Extend" if you want to use your TV as an additional monitor for more space.
Make sure to adjust resolution settings as well. The resolution should match your TV's capabilities for optimal viewing experience. This adjustment ensures that images look clear and not stretched or pixelated.
After setting everything up, test it out by opening a video or presentation on your laptop. Check how it appears on your TV screen. If something doesn't look right, revisit your display settings until you find what works best.
Choosing the Right HDMI Cable
Types of HDMI Cables
HDMI cables come in different types. Standard HDMI cables are suitable for most uses. They support 1080p video and basic audio. For higher resolutions, consider High Speed HDMI cables. These support 4K video and higher refresh rates. If you need even better quality, look for Premium High Speed HDMI cables. They handle 4K at 60Hz with HDR support.
For the latest technology, Ultra High Speed HDMI cables are ideal. They support 8K video and advanced features like dynamic HDR. Each cable type has specific use cases. Always check for certification labels. These labels ensure the cable meets certain performance standards.
Length Considerations
Length is important when choosing an HDMI cable. Measure the distance between your laptop and TV. This helps determine the best cable length. A shorter cable is often better for signal quality. Avoid excessively long cables as they can cause signal degradation.
If you need a longer reach, consider using HDMI extenders or boosters. These devices help maintain signal strength over longer distances. They can be useful if your setup requires more flexibility.
Quality vs Price
Finding the right balance between quality and price is crucial. High-quality cables often perform better but may cost more. Avoid overpaying for features you don’t need. Research reputable brands that offer good performance without breaking the bank.
Look for user reviews to gauge reliability. Warranties can also indicate long-term value. A good warranty shows the manufacturer trusts their product's quality.
Troubleshooting Connection Issues
No Signal on TV
A common issue is receiving a no signal message on your TV. Start troubleshooting by checking all cable connections. Ensure that the HDMI cable fits securely in both the laptop and TV ports. Loose connections can easily cause this problem.
Next, confirm that the TV is set to the correct HDMI input source. Most TVs have multiple HDMI ports. Press the "Input" or "Source" button on your remote to cycle through them. If the connection still fails, restart both the laptop and TV. This refreshes the connection and may resolve any temporary glitches.
Audio Problems
Audio problems can also arise during connection. Verify that your TV is selected as the audio output device in your laptop's sound settings. Right-click on the sound icon in the taskbar and select "Playback devices." Set your TV as the default device if it's not already.
Check volume levels on both devices. Sometimes, either the laptop or TV may be muted. Adjusting these levels can often solve audio issues. If problems persist, test the HDMI cable with another device. This will help rule out any cable-related issues.
Display Resolution Issues
Display resolution can affect how content appears on your TV. Adjust display settings on your laptop to match the TV's native resolution for optimal clarity. Most modern TVs have a native resolution of 1080p or 4K. Access your display settings by right-clicking on the desktop and selecting "Display settings."
If the image appears distorted or blurry, experiment with different resolutions. Sometimes, a lower resolution may provide a better picture quality depending on your setup. Ensure that the HDMI cable supports the desired resolution, especially for 4K displays. Not all HDMI cables are created equal; some may not support higher resolutions.
Summary
Connection issues can occur when linking an Acer laptop to a TV with an HDMI cable. Start by addressing no signal messages through secure connections and correct input sources. Audio problems require checking output settings and volume levels. Lastly, adjust display resolutions for clear visuals.
Wireless Alternatives to HDMI
Benefits of Wireless
Wireless connections offer convenience. They eliminate the need for physical cables. This means no more tangled wires or limited movement. Users can place their devices anywhere without worrying about cable length.
Streaming content becomes easier with wireless options. No need to plug and unplug cables every time you want to switch devices. You can connect your laptop, smartphone, or tablet seamlessly. This flexibility enhances the overall viewing experience.
Miracast Overview
Miracast is a wireless technology designed for screen mirroring. It allows compatible devices to connect without any additional hardware. Simply enable the feature on both devices, and you're ready to go.
This technology supports high-definition video and audio streaming. Users can watch movies or play games with minimal lag. Miracast works well with Windows laptops and many smart TVs. Its ease of use makes it a popular choice among users looking for quick connections.
Chromecast Overview
Chromecast is another great option for wireless streaming. It enables users to stream directly from various apps to their TV. This device works with Android, iOS, and even the Chrome browser on computers.
Casting content is simple and efficient. Users can enjoy shows, movies, and music in up to 4K resolution. This capability greatly enhances the viewing experience at home.
Setting up Chromecast is straightforward. Connect it to your TV's HDMI port and follow the instructions on your device. Once set up, casting is just a tap away.
Both Miracast and Chromecast provide excellent alternatives to traditional HDMI connections. They allow users to connect multiple devices without hassle. These methods avoid the common issues faced with wired connections discussed earlier.
In summary, wireless options like Miracast and Chromecast enhance connectivity between laptops and TVs. They provide flexibility, ease of use, and high-quality streaming experiences without the clutter of cables.
Setting Up Miracast
Check Device Compatibility
Verify that both the laptop and TV support Miracast or Chromecast for seamless connectivity. Most modern laptops and TVs include this feature, but it’s essential to double-check. Consult device specifications or user manuals to confirm compatibility. Look for terms like "Miracast" in the documentation.
Ensure that the laptop's operating system is updated to support wireless technologies. Windows 8.1 and later versions typically support Miracast. If your laptop runs an older OS, consider updating it.
Enable Miracast on Laptop
Access the display settings on your laptop to enable Miracast functionality. This can usually be done by right-clicking on the desktop and selecting "Display settings."
Ensure Wi-Fi is turned on, as Miracast relies on wireless connections. Navigate to the network settings to verify Wi-Fi is active. Once Wi-Fi is enabled, look for options related to projecting your screen. Follow prompts to search for available devices to connect to your TV.
Connect to TV
Initiate the connection process by selecting your TV from the list of available devices. The laptop will scan for nearby compatible displays. Your TV should appear in this list if both devices are ready.
Confirm the connection request on both the laptop and TV for successful pairing. You may need to accept a prompt on your TV screen to allow the connection. Wait for the devices to establish a connection, which may take a few moments.
If you encounter issues during this process, consider checking for updates on both devices. Sometimes, outdated drivers can cause connectivity problems. Restarting both the laptop and TV can also help resolve minor glitches.
Screen mirroring offers a flexible way to display content from your laptop onto a larger screen without needing an HDMI cable. This method is particularly useful when you want to share presentations or stream videos with friends and family.
Using an HDMI Miracast dongle can enhance your experience if either device lacks built-in support for wireless technologies. These dongles plug into your TV's HDMI port and provide a wireless bridge between your laptop and TV.
Setting Up Chromecast
Set Up Chromecast Device
Plug the Chromecast device into the TV's HDMI port. Connect it to a power source using the included cable.
Download the Google Home app on your smartphone or tablet. This app is essential for setup. Open the app and follow the instructions to connect Chromecast to your Wi-Fi network. Make sure your phone or tablet is connected to the same network.
Cast from Chrome Browser
Open the Chrome browser on your laptop. Click on the three-dot menu located in the top right corner. Select the "Cast" option from the dropdown menu.
A list of available devices will appear. Choose your Chromecast device from this list. You can select what you want to cast, such as a specific tab or your entire desktop. This feature allows you to share videos, presentations, or any content with ease.
Troubleshoot Chromecast Issues
If you experience connectivity problems, restart your Chromecast device first. Unplug it from the HDMI port and plug it back in after a few seconds. Then, restart your Wi-Fi router as well.
Check if both your laptop and Chromecast are connected to the same Wi-Fi network. This connection is crucial for proper communication between devices. If they are on different networks, casting will not work.
Look for software updates on both the Chromecast and Google Home app. Updates can resolve bugs that may affect performance. Keeping everything updated ensures smoother operation.
The process of setting up Chromecast is straightforward. It offers an easy alternative to Miracast for those who prefer streaming via an HDMI connection. By following these steps, users can enjoy their laptop content on a larger screen quickly.
Summary
Connecting your Acer laptop to a TV via HDMI is straightforward. You’ve learned the benefits of HDMI, how to prepare your devices, and troubleshoot common issues. Plus, you explored wireless alternatives like Miracast and Chromecast. Each method offers unique advantages depending on your setup and preferences.
Now it’s time to put this knowledge into action. Whether you’re streaming movies or giving a presentation, connecting your laptop to your TV enhances your experience. Don’t hesitate to try out different methods to find what works best for you. Dive in and elevate your viewing experience today!
Frequently Asked Questions
How do I check if my Acer laptop supports HDMI output?
Most Acer laptops have an HDMI port. Check your laptop's specifications or look for a port that resembles a trapezoid shape, usually located on the side. If present, your laptop supports HDMI output.
What should I do if my TV doesn’t recognize my Acer laptop?
Ensure both devices are powered on and the correct HDMI input is selected on your TV. You may also need to restart both devices or try a different HDMI cable.
Can I use an HDMI adapter for older Acer laptops?
Yes, you can use an HDMI adapter if your laptop has a VGA or DisplayPort. Just connect the adapter to your laptop and then use an HDMI cable to connect it to the TV.
Do I need to change any settings after connecting my laptop to the TV?
You may need to adjust display settings. Right-click on the desktop, select "Display settings," and choose how you want the screen to appear (duplicate or extend).
Is audio transmitted through HDMI when connecting my laptop to a TV?
Yes, HDMI carries both video and audio signals. Ensure your TV is set as the default audio device in your laptop's sound settings for optimal playback.
What type of HDMI cable should I use for connecting my Acer laptop to a TV?
A standard High-Speed HDMI cable is sufficient for most connections. For 4K resolution or higher, consider using a Premium High-Speed HDMI cable for better performance.
Are there wireless options available for connecting my Acer laptop to a TV?
Yes, options like Miracast and Chromecast allow wireless connections. These methods enable screen mirroring without needing physical cables, providing flexibility and convenience.
What's Your Reaction?


![How to Fix Acer Laptop Black Screen Issue [Causes & Solutions]](https://tomsreviewbox.com/uploads/images/202408/image_430x256_66ab529c8a89f.jpg)