![MacBook Pro M5: All the features and specs you need to know [LEAKS REVEALED]](https://tomsreviewbox.com/uploads/images/202502/image_430x256_67bd6d7cd7562.jpg)


How Can I Connect HP Printer to WiFi? 5 Quick Fixes You Need to Know!
Learn how can we connect HP printer to WiFi with our step-by-step guide. Easy setup, troubleshooting tips included!
Connecting your HP printer to WiFi allows you to print wirelessly from any device, making your home or office setup more flexible and efficient. This process is straightforward, but it can vary slightly depending on your printer model and WiFi network. In this guide, we'll walk you through the steps to easily connect your HP printer to your WiFi network and troubleshoot common issues.
What Does Connecting an HP Printer to WiFi Mean?
Connecting an HP printer to WiFi means linking the printer to your wireless network, allowing it to communicate with your devices without needing physical cables. This connection enables you to print documents and photos from computers, smartphones, or tablets wirelessly, providing more convenience and flexibility in your daily tasks.
Wireless printing has become an essential feature in both home and office environments. By connecting your HP printer to a WiFi network, you eliminate the need for cumbersome cables and can place your printer anywhere within the range of your network. This setup is especially useful in offices where multiple users need to access the same printer.
Color All-in-One Printer
Examples:
- Printing documents from a laptop in another room without having to physically connect to the printer.
- Sending print jobs from your smartphone while you're still in bed.
Tips:
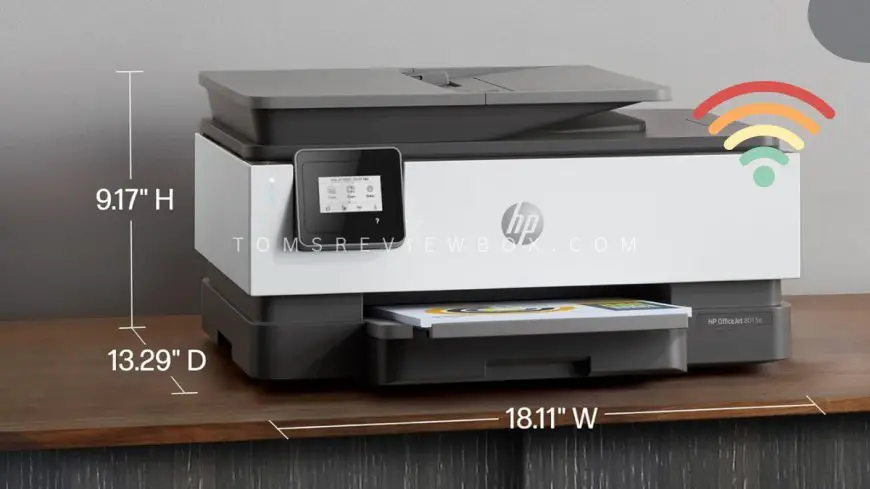
- Ensure your WiFi network is stable and has a strong signal where your printer is placed.
- Keep your printer’s firmware updated to avoid connectivity issues.
- Use the HP Smart app for an easier setup and troubleshooting process.
Table: Step-by-Step Guide to Connect HP Printer to WiFi
| Step | Action | Description |
|---|---|---|
| 1. Prepare your printer | Turn on your HP printer and ensure it’s within range of your WiFi network. | This is the first step to ensure your printer is ready for the connection process. |
| 2. Access the Control Panel | Go to the printer’s control panel, and select the Wireless icon or button. | The control panel is where you will find settings to configure your printer’s network options. |
| 3. Select WiFi Setup | Choose WiFi Setup Wizard (if available) from the control panel options. | The setup wizard will guide you through the necessary steps to connect your printer to WiFi. |
| 4. Choose your Network | Select your WiFi network from the list of available networks. | This step requires you to identify and select your specific WiFi network. |
| 5. Enter WiFi Password | Enter your WiFi network password when prompted. | Ensure you type the correct password to avoid connection failures. |
| 6. Confirm the Connection | Follow any additional prompts to complete the setup, and confirm the connection is successful. | Check the printer’s display or settings to confirm that it is now connected to your WiFi network. |
| 7. Install Printer Software | Download and install the HP printer software on your computer or mobile device. | This software helps manage print jobs and printer settings wirelessly from your device. |
Understanding Network Requirements
Before connecting our HP printer to WiFi, it's important to ensure that our network meets certain criteria. Here are the key requirements:
- Network Type: A conventional wireless network setup is essential. This includes a stable WiFi connection and a router that supports the 2.4 GHz frequency band (HP).
- SSID and Password: Ensure that the network name (SSID) and password are correct. Some routers, like the latest Xfinity routers, combine 2.4GHz, 5GHz, and 6GHz bands under one network name and password, which can help devices choose the best connection (Xfinity Forums).
- Network Naming Conventions: If the modem is a dual-band modem with the same network name for both bands, it may cause issues. It's crucial to ensure that the network naming conventions are compatible with our HP printer (Xfinity Forums).
- Operating System: Make sure our operating system is up-to-date to avoid compatibility issues.
Checking Compatibility
To ensure that our HP printer can connect to the WiFi network, we need to check the compatibility of all devices involved. Here are the steps:
- Printer Compatibility: Verify that our HP printer model supports WiFi connectivity. Most modern HP printers come equipped with wireless capabilities.
- Router Compatibility: Confirm that the router supports the 2.4 GHz frequency band, which is commonly used for wireless printer connections.
- Device Compatibility: Ensure that the computer or mobile device we are using for the setup is compatible with the HP printer and the WiFi network.
| Device | Compatibility Check |
|---|---|
| HP Printer | Wireless capability, support for 2.4 GHz band |
| Router | Support for 2.4 GHz frequency, correct SSID and password |
| Computer/Mobile Device | Up-to-date operating system, compatible with HP printer |
By understanding the network requirements and checking the compatibility of our devices, we can set the stage for a successful connection between our HP printer and the WiFi network.
Using HP Auto Wireless Connect
HP Auto Wireless Connect is a technology that simplifies the process of connecting HP printers to WiFi. This method allows for automatic network configuration during the initial setup and installation process (HP).
Initial Setup Steps
To begin the process, ensure that we have a conventional wireless network setup, an up-to-date operating system, and that the printer is connected to a computer network operating at the 2.4 GHz frequency (HP). Follow these steps for the initial setup:
- Unbox and Power On: Unbox the HP printer, connect it to a power source, and turn it on.
- Install Ink Cartridges and Load Paper: Install the ink cartridges and load paper into the tray according to the instructions provided.
- Initiate Setup Process: On the printer's control panel, navigate to the setup menu and select the network or wireless settings option.
- Select Auto Wireless Connect: Choose the 'HP Auto Wireless Connect' option from the available setup methods.
Automatic Network Configuration
Once we have initiated the HP Auto Wireless Connect, the printer will automatically start configuring the network settings. This process includes detecting the network and applying the necessary configurations to establish a connection. Here’s how it works:
- Network Detection: The printer will scan for available wireless networks and choose the one with the most suitable connection.
- Configuration: The printer will automatically configure the network settings, including the SSID and password, to match the existing network.
- Connection Confirmation: Once the configuration is complete, the printer will attempt to connect to the WiFi network. A notification will be displayed on the control panel indicating the success of the connection.
| Step | Description |
|---|---|
| 1 | Unbox and power on the printer |
| 2 | Install ink cartridges and load paper |
| 3 | Initiate setup process from control panel |
| 4 | Select 'HP Auto Wireless Connect' |
| 5 | Printer detects available networks |
| 6 | Automatic network configuration |
| 7 | Connection confirmation |
By using HP Auto Wireless Connect, we can seamlessly integrate our HP printer into the existing wireless network, making the process straightforward and hassle-free.
WiFi Protected Setup (WPS)
WiFi Protected Setup (WPS) is a convenient method to connect your HP printer to the WiFi network without needing to enter the network name and password manually. This method requires both the printer and the router to support WPS. Below are the steps to enable WPS on the printer and activate WPS on the router.
Enabling WPS on Printer
To use WPS, we first need to enable it on our HP printer.
- Power on the Printer: Ensure the printer is turned on and ready.
- Activate WPS Mode: Depending on the model, we can usually find the WPS button on the printer’s control panel. Press the WPS button to start the wireless connection process.
Some models may require navigating through the printer’s menu:
- Go to the Network menu.
- Select Wireless Settings.
- Choose WiFi Protected Setup, then Push Button, and press Start.
Activating WPS on Router
Once WPS is enabled on the printer, we need to activate it on our router.
- Locate the WPS Button: Find the WPS button on the router. This is usually labeled "WPS" and located on the back or side of the router.
- Press the WPS Button: Press and hold the WPS button on the router for about 2-3 seconds. The WPS light should blink, indicating that the router is in WPS mode.
| Device | Action |
|---|---|
| HP Printer | Press the WPS button or navigate through the menu to enable WPS |
| Router | Press and hold the WPS button for 2-3 seconds |
By following these steps, we can establish a wireless connection between our HP printer and the WiFi network using WPS (HP). If the connection is successful, the printer should display a confirmation message or the wireless light will stop blinking and remain steady.
Wireless Setup Wizard
The Wireless Setup Wizard is a straightforward method for connecting your HP printer to a WiFi network. This method is particularly useful for HP printers equipped with built-in displays. The process involves accessing the wizard through the printer’s network options and entering the necessary network details.
Accessing the Wizard
To start, we need to access the Wireless Setup Wizard on our HP printer. Follow these steps:
- Turn on the Printer: Ensure that the printer is powered on and has a stable power connection.
- Access the Touchscreen Display: Navigate to the printer’s control panel. For most HP printers, this will be a touchscreen display.
- Open the Network Menu: On the touchscreen, look for the "Network" or "Wireless" settings option. This is typically represented by a wireless icon.
- Select Wireless Setup Wizard: Within the Network or Wireless settings, select the "Wireless Setup Wizard" option.
Entering Network Information
Once we have accessed the Wireless Setup Wizard, we need to enter our network details to connect the printer to the WiFi. Here are the steps:
- Search for Available Networks: The wizard will automatically search for available wireless networks. A list of available networks will appear on the screen.
- Select Your Network: From the list of available networks, select the SSID (network name) of your WiFi.
- Enter the Security Key: You will be prompted to enter the WiFi password. Use the on-screen keyboard to input the security key accurately.
- Confirm and Connect: After entering the password, confirm the settings. The printer will attempt to connect to the selected network. This may take a few moments.
- Connection Confirmation: Once connected, the printer will display a confirmation message. You may also see a wireless signal icon, indicating a successful connection.
| Step | Action |
|---|---|
| 1 | Turn on the Printer |
| 2 | Access the Touchscreen Display |
| 3 | Open the Network Menu |
| 4 | Select Wireless Setup Wizard |
| 5 | Search for Available Networks |
| 6 | Select Your Network |
| 7 | Enter the Security Key |
| 8 | Confirm and Connect |
| 9 | Connection Confirmation |
By following these steps, we can efficiently connect our HP printer to a WiFi network using the Wireless Setup Wizard. For additional information and troubleshooting steps, refer to the HP Support page or consult the printer’s user guide.
Manual IP Configuration
When automatic methods fail to connect your HP printer to WiFi, setting a manual IP address can often resolve connectivity issues. Here, we'll walk through the steps of setting a manual IP and reserving it in your router.
Setting a Manual IP
- Access Printer Settings: On the printer's control panel, navigate to the network settings menu.
- Select Manual IP: Choose the option to set a manual IP address.
- Enter IP Address: Input an IP address that falls within your network's range but is outside the DHCP range of your router. For example, if your router's DHCP range is 192.168.1.2 to 192.168.1.100, you could set the printer's IP to 192.168.1.101.
- Input Subnet Mask: Typically, this will be 255.255.255.0.
- Input Default Gateway: This is usually your router's IP address, often 192.168.1.1.
- Save Settings: Confirm and save the new settings.
| Setting | Example Value |
|---|---|
| IP Address | 192.168.1.101 |
| Subnet Mask | 255.255.255.0 |
| Default Gateway | 192.168.1.1 |
Reserving IP in Router
- Log into Router: Access your router's interface by typing its IP address into a web browser. Commonly, this is 192.168.1.1 or 192.168.0.1.
- Navigate to DHCP Settings: Look for a section labeled "DHCP," "LAN," or "Network Settings."
- Add a Reservation: Find the option to reserve an IP address.
- Enter Printer's MAC Address: This is usually found in the printer's network settings menu.
- Input Manual IP: Enter the IP address you set for the printer.
- Save Changes: Confirm and save the settings.
By following these steps, we ensure the printer maintains a consistent IP address, even if the network restarts. This helps in establishing a stable connection, as highlighted in a Xfinity Forums user experience.
Utilizing a manual IP configuration can address many connectivity issues, providing a reliable connection for our HP printers. Always refer to your HP documentation for additional troubleshooting tips.
Troubleshooting Common Issues
Even with the best preparation, sometimes issues arise when trying to connect an HP printer to WiFi. Here we will walk through two common troubleshooting steps: resetting the wireless settings and using the HP Smart App.
Resetting Wireless Settings
Resetting the wireless settings on your HP printer is a crucial first step if you're experiencing connectivity issues, especially after moving to a new network. This process ensures that the printer forgets the old network and is ready to connect to a new one.
- Locate the Wireless Settings Menu: On the printer's control panel, navigate to the wireless settings menu.
- Select 'Restore Network Settings': This option is usually found under the 'Network' or 'Settings' tab. Confirm the selection.
- Wait for the Reset: The printer will take a few moments to reset its wireless settings to the factory defaults.
These steps will disconnect the printer from any existing WiFi networks and clear out saved network information. For a detailed guide, you can refer to the HP Community.
Using HP Smart App
The HP Smart App is a valuable tool for setting up and managing your printer's connection to a WiFi network. After resetting the wireless settings, follow these steps to reconnect your printer using the app:
- Download and Install the HP Smart App: The app is available for both iOS and Android devices. Ensure you have the latest version installed.
- Open the HP Smart App: Launch the app and ensure your mobile device is connected to the same WiFi network you want your printer to join.
- Add a New Printer: Tap on the '+' icon to add a new printer. The app will search for available printers.
- Select Your Printer: Once your printer appears in the list, select it.
- Follow On-Screen Instructions: The app will guide you through the steps to connect your printer to the WiFi network. This includes entering your network password and confirming the connection.
Using the HP Smart App simplifies the process and ensures a seamless transition from the old network to the new one. For more detailed instructions, visit the HP Community.
By following these troubleshooting steps, we can resolve common connectivity issues and successfully connect our HP printer to the WiFi network.
Final Thoughts: How Can I Connect My HP Printer to WiFi?
Connecting your HP printer to WiFi is a convenient way to enjoy wireless printing at home or in the office. By following the steps outlined in this guide, you can easily set up your printer and start printing from any device on your network. Remember, a stable WiFi connection and keeping your printer’s firmware up to date are key to maintaining a smooth printing experience. Don’t hesitate to refer back to this guide or the FAQs below if you encounter any issues.
FAQs About Connecting an HP Printer to WiFi
Q: What should I do if my HP printer won’t connect to WiFi?
A: If your HP printer won’t connect to WiFi, try restarting both your printer and router. Ensure that the printer is within range of the WiFi network and that the network is stable. Double-check your WiFi password and enter it correctly. If problems persist, use the HP Smart app to diagnose and fix connectivity issues.
Q: Can I connect my HP printer to WiFi without using a computer?
A: Yes, you can connect your HP printer to WiFi without a computer by using the printer’s control panel. Navigate to the wireless setup menu and follow the on-screen instructions to connect to your network. Alternatively, you can use the HP Smart app on your smartphone or tablet to set up the connection.
Q: How do I reconnect my HP printer to a new WiFi network?
A: To reconnect your HP printer to a new WiFi network, reset the printer’s network settings through the control panel. Then, follow the steps in the WiFi setup wizard to select the new network and enter the corresponding password. Make sure your devices are connected to the same network to ensure seamless printing.
Q: What is the WPS method, and how do I use it to connect my HP printer to WiFi?
A: WPS (Wi-Fi Protected Setup) allows you to connect your HP printer to WiFi without entering a password. To use this method, press the WPS button on your router, then press the corresponding WPS button on your printer. This will automatically establish a secure connection between the devices.
Q: How can I check if my HP printer is connected to WiFi?
A: To check if your HP printer is connected to WiFi, look for a wireless icon or indicator light on the printer’s control panel. You can also print a network configuration page from the printer settings, which will show the connection status. Additionally, check the HP Smart app or your printer software on your computer for connection status.
Q: Why is my printer connected to WiFi but not printing?
A: If your printer is connected to WiFi but not printing, ensure there are no error messages on the printer’s display. Check if the printer is selected as the default printer on your device. Verify that there are no pending print jobs in the print queue. Restart both your printer and device, and ensure they are connected to the same WiFi network.
What's Your Reaction?