


![MacBook Pro M5: All the features and specs you need to know [LEAKS REVEALED]](https://tomsreviewbox.com/uploads/images/202502/image_430x256_67bd6d7cd7562.jpg)


Galaxy S21 Battery Replacement: Step-by-Step Guide
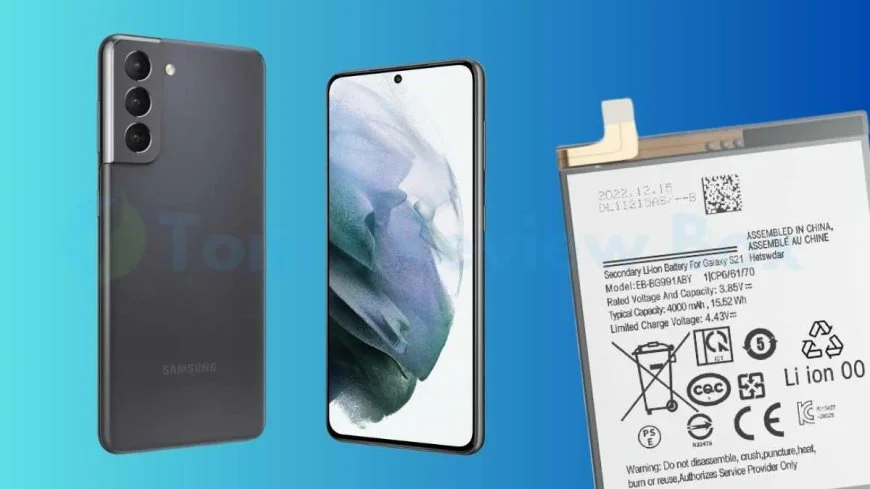
Get a high capacity replacement battery for Galaxy S21 (G991) with professional repair tools. Shop now on Amazon.
Looking to replace the battery on your Galaxy S21? Wondering about the process and cost involved in a Galaxy S21 battery replacement? You've come to the right place.
When it comes to Galaxy S21 battery replacements, understanding the procedure and finding reliable options is crucial. In this post, we will guide you through the steps involved in replacing the battery of your Galaxy S21, providing insights into costs, reputable service providers, and tips for a successful replacement.
Curious to learn more about how to prolong your Galaxy S21's battery life or troubleshoot common issues related to battery performance? Keep reading for valuable information and expert advice on maintaining your device's battery health.
Key Takeaways
-
Prepare for Battery Replacement: Gather necessary tools and review guides before starting the replacement process to avoid any complications.
-
Handle Components Carefully: Be gentle when disassembling and removing the battery to prevent damage to other parts of the device.
-
Follow Reassembly Tips: Ensure all components, adhesive, camera shell, connector, and back are correctly placed and secured during reassembly to prevent malfunctions.
-
Troubleshoot Common Connector Issues: Address common connector problems like improper fit or connectivity issues post-replacement with troubleshooting techniques provided.
-
Maintain and Care for Your Device: Regularly check the battery health and follow maintenance tips to prolong the lifespan of your Galaxy S21 battery.
-
Take Action to Preserve Battery Life: Implement the maintenance and care suggestions to optimize your device's battery performance and longevity.
Preparing for Replacement
Gather Tools
Before starting the battery replacement process, gather all necessary tools. Make sure you have a Phillips screwdriver, tweezers, an opening pick, and isopropyl alcohol ready. Have pre-cut adhesive or double-sided adhesive tape available to secure the new battery properly, back or edge.
Safety Precautions
Prioritize safety by completely powering off your phone before beginning any disassembly. Exercise caution when applying heat to avoid damaging internal components. Be extra careful not to puncture or bend the battery during removal to prevent any potential safety hazards.
Understand Steps
Familiarize yourself with each step of the battery replacement process before proceeding. Understand the sequence of actions required to safely remove and replace the battery. Follow each step meticulously to ensure a successful battery replacement.
Opening the Device
Heat Bottom Edge
-
Heat the bottom edge of the back cover using an iOpener for two minutes.
-
Apply consistent heat to soften the adhesive for easier removal.
-
Ensure the heat is evenly distributed along the bottom edge.
Separate Adhesive
Left Edge
-
Apply heat to the left edge of the back cover to facilitate its removal.
-
Use caution when heating this area to avoid damage to internal components.
-
Slide the opening pick along the left edge to separate the back cover from the frame.
Right Edge
-
Apply heat to the right edge of the back cover to loosen the adhesive.
-
Use a steady force when pulling up on the back cover to create a gap.
-
Slide the opening pick along the right edge to cut through the adhesive.
Corner Adhesive
-
Pay attention to the adhesive in the corners of the back cover.
-
Use heat and precision when removing the back cover from corners.
-
Ensure all adhesive residue is cleaned from the corners before reassembly.
Remove Back Cover
-
Remove the back cover carefully to avoid any damage to internal components.
-
Use a combination of tools to detach the back cover without causing cracks.
-
Take your time to ensure the back cover is removed smoothly.
Disassembling Internals
Unfasten Motherboard Bracket
Unfasten the screws securing the motherboard bracket to the frame. Use a Phillips screwdriver for this task. Keep track of the screws to avoid any misplacement issues during reassembly.
Remove Camera Shell
Carefully remove the camera shell to prevent damage. Take caution while detaching it to ensure the camera's functionality remains intact. Make sure the camera shell is safely removed before proceeding further.
Disconnect Components
Wireless Charging Coil
Detach the wireless charging coil carefully from its connector. Ensure a gentle yet firm grip when handling this component.
Loudspeaker
Disconnect the loudspeaker by gently releasing its connector. Handle with care to prevent any damage during disconnection.
Display Cable
Disconnect the display cable by carefully unlatching its connector. Avoid applying excessive force when detaching to prevent any harm to the cable.
Battery Removal Process
Apply Isopropyl Alcohol
To start the battery replacement process, apply isopropyl alcohol around the edges of the phone's back cover. This helps to loosen the adhesive holding the cover in place. Use a plastic card to gently pry open the back cover after applying the alcohol.
Once you have successfully removed the back cover, locate the screws securing the battery in place. Unscrew these carefully and set them aside in a safe place to avoid misplacement during reassembly later on.
Insert Opening Pick
Insert an opening pick or a plastic tool between the battery and the frame of the phone. Gently slide it along the edges to break any remaining adhesive bonds without damaging other components inside.
Carefully work your way around the battery, ensuring that you apply consistent pressure to separate it from the adhesive underneath. Take your time to avoid bending or puncturing the battery during this step.
Separate Battery Adhesive
After loosening all sides of the battery, carefully lift it from its position using a plastic card or a spudger tool. Be cautious not to bend or damage the battery while separating it from any remaining adhesive still clinging to its surface.
Inspect for any leftover adhesive residue on both the battery and inside of the phone. Clean these surfaces thoroughly with isopropyl alcohol and a clean cloth before proceeding with installing a new battery.
Remove Battery
With all adhesive fully detached, gently lift out the old battery from its housing. Ensure that no cables or connectors are still attached before completely removing it from inside the device.
Dispose of the old battery responsibly following local regulations for electronic waste recycling. Now you are ready to proceed with installing a new battery into your Galaxy S21 device for improved performance and longer usage times.
Handling Components
Disconnect Interconnect Cables
When disconnecting interconnect cables, start by locating the small connectors on the motherboard. Gently lift the connectors using a plastic spudger tool to avoid damage.
Be cautious not to apply too much force when removing the interconnect cables. A gentle wiggle and pull motion should suffice for safe disconnection.
Careful Component Removal
Wireless Coil
The wireless coil is a vital internal component responsible for wireless charging functionality. Handle it delicately to prevent any damage during removal.
When removing the wireless coil, ensure that you keep track of its orientation for correct reinstallation later on.
Loudspeaker
The loudspeaker plays a crucial role in audio output quality. Use a prying tool to carefully lift and remove the loudspeaker from its housing.
Avoid bending or damaging the loudspeaker flex cable during removal to maintain its functionality.
Reassembly Tips
Secure Connections
To ensure the secure connections of all components, double-check each connection point for proper alignment. Make sure connectors are firmly in place to prevent future issues. Test the connections by gently moving the components to see if they stay in place.
Loose connections can lead to poor device performance or even failure. It's crucial to verify that all connections are secure before proceeding with reassembly. Avoid forcing connections as this can damage delicate components.
Reattach Back Cover
When reattaching the back cover, align it carefully with the device frame. Apply gentle pressure evenly across the edges to snap it back into place securely. Check for any gaps or unevenness in the fit, which may indicate improper alignment.
A properly attached back cover ensures the device's structural integrity and protects internal components from dust and moisture. Take your time to align and secure the back cover correctly to maintain the device's aesthetics and functionality.
Test Device Functionality
After completing the reassembly process, test the device functionality thoroughly. Power on the device and check all functions such as screen responsiveness, camera operation, and audio output. Ensure that all buttons work correctly without sticking or malfunctioning.
Testing the device functionality is essential to confirm that all components were reassembled correctly. Check for any unusual sounds, overheating, or abnormal behavior during operation. Address any issues promptly to prevent further damage.
Troubleshooting Common Issues
Power Problems
Power problems on the Galaxy S21 can be frustrating, but there are key troubleshooting steps you can take. First, ensure that the device is charged properly and that the battery is functioning well. If the issue persists, try restarting the phone or performing a factory reset. Checking for software updates may also resolve power-related issues.
e users have reported that certain apps drain the battery excessively. To address this, monitor your app usage and consider uninstalling any apps that consume too much power. Enabling power-saving mode can also help prolong battery life during critical times.
Connectivity Issues
Connectivity problems on your Galaxy S21 can hinder your user experience. Begin by checking if airplane mode is off and if Wi-Fi or mobile data is enabled. Restarting the device or toggling airplane mode on and off might help resolve connectivity issues. If you're facing Bluetooth problems, ensure that both devices are in close proximity and try unpairing and repairing them.
To troubleshoot Wi-Fi problems, check if other devices can connect to the same network successfully. If not, restart your router or contact your internet service provider for assistance. For mobile data issues, verify that your carrier coverage is adequate in your area.
Hardware Malfunctions
Hardware malfunctions on the Galaxy S21 can be challenging to deal with. If you encounter issues with the camera, try clearing the app's cache or restarting the device. Updating the camera app from the Google Play Store might also fix any software-related problems.
If you're experiencing display problems such as flickering screens or unresponsive touch controls, consider performing a soft reset by holding down the power button for a few seconds. In case of persistent hardware issues, it's advisable to reach out to Samsung's customer support for further assistance.
Maintenance and Care
Battery Health Tips
To extend the lifespan of your Galaxy S21 battery, avoid overcharging it as this can lead to long-term damage. Ensure you use only certified charging products to prevent any potential harm to the battery.
It is advisable to keep your phone's battery between 20% and 80% capacity for optimal performance. Avoid letting the battery drain completely, as this can impact its overall health in the long run.
Device Cleaning
Regularly cleaning your Galaxy S21 is crucial for maintaining its performance and longevity. Use a soft, dry cloth to wipe down the screen and body of the device to prevent dust and dirt buildup.
Avoid using harsh chemicals or abrasive materials when cleaning your phone, as these can cause damage to the device's exterior. For stubborn stains, consider using a mild solution of water and gentle soap.
Regular Checkups
Performing routine checkups on your Galaxy S21 can help you identify any potential issues early on. Keep an eye out for any physical damage, such as cracks or dents, that may affect the device's functionality.
Regularly inspect the charging port for any debris or dust accumulation that could interfere with charging. If you notice any abnormalities in your phone's performance, such as sudden shutdowns or overheating, it may be time to seek professional repair services.
Summary
In summary, you've learned the essential steps for replacing the battery in your Galaxy S21. From preparation to troubleshooting common issues, you now have a comprehensive guide to ensure a successful battery replacement process. Remember to handle components with care and follow the reassembly tips provided to avoid any complications. Maintenance and care are crucial post-replacement to prolong your device's lifespan.
Now that you are equipped with this knowledge, it's time to take action and replace your Galaxy S21 battery confidently. Don't hesitate to share this valuable information with others who might benefit from it. Your device's performance and longevity are in your hands—follow these steps and enjoy an optimally functioning Galaxy S21!
Frequently Asked Questions
How do I prepare for a Galaxy S21 battery replacement?
To prepare for a Galaxy S21 battery replacement:
-
Gather necessary tools like screwdrivers and prying tools.
-
Ensure you have a clean, well-lit workspace.
-
Back up your device data to prevent any loss during the process.
What is the process for opening the Galaxy S21 device?
To open the Galaxy S21 device:
-
Heat the adhesive around the edges with a heat gun or hairdryer.
-
Carefully insert a prying tool to separate the back cover from the frame.
-
Work your way around the edges to avoid damaging the components inside.
How do I safely remove the battery during a replacement?
To safely remove the battery during a replacement:
-
Disconnect any attached cables carefully.
-
Use appropriate tools to gently pry the battery from its housing.
-
Avoid bending or puncturing the battery to prevent any damage.
What are some reassembly tips after replacing the battery?
After replacing the battery, follow these reassembly tips:
-
Double-check all connections before closing the device.
-
Apply new adhesive to secure the back cover in place.
-
Power on the device and ensure it functions properly before finalizing reassembly.
How can I troubleshoot common issues post-battery replacement?
If you encounter issues post-replacement:
-
Check all connections to ensure they are secure.
-
Perform a soft reset by holding down power and volume buttons.
-
If issues persist, seek professional assistance or refer back to troubleshooting guides.
What's Your Reaction?


-
 LucGreat walkthrough. You need to add the steps needed after replacing the battery to reset battery cycle count as well as initialization for the new battery. If you aren' familiar, google is your friend.


